

Creating 16 bits luminosity masks and half masks
A tutorial on the creation of the normal (integer) and half luminosity masks in 16 bits for Photoshop using the Calculation and Levels method combined without loading selections.In one of my older blog posts from 2014 I explained in detail how to create luminosity masks, using a simple method. That article describes the basic way of creating luminosity masks by loading and intersecting selections.
The downside of this method is that it only allows you to create a limited set of luminosity masks: luminosity masks in between the integer values, what I call half value luminosity masks, cannot be created using this method. Another downside, more theoretically than practically, is that since selections are used to create the luminosity masks in this method, they will always be 8-bit masks instead of 16-bit masks, as a selection is hard-wired in Photoshop to be 8 bits.
The method I’m describing here is a 16-bit method of creating masks that allows you to create any value between the luminosity masks with integer numbers, without loading selections during the creation of the masks, so the 16-bit depth of the channel masks will be preserved. It’s a method that has been described earlier by, of course, Tony Kuyper and several other photographers. I’m trying to put variations on this method with the Levels tool together in one article and at the same time describe how to create the in-between values when applying this slight variation to the 16-bit method as described earlier by Tony Kuyper and others.
A 16-BIT METHOD FOR ‘NORMAL LUMINOSITY’ MASKS WITH INTEGER ‘FULL’ VALUES
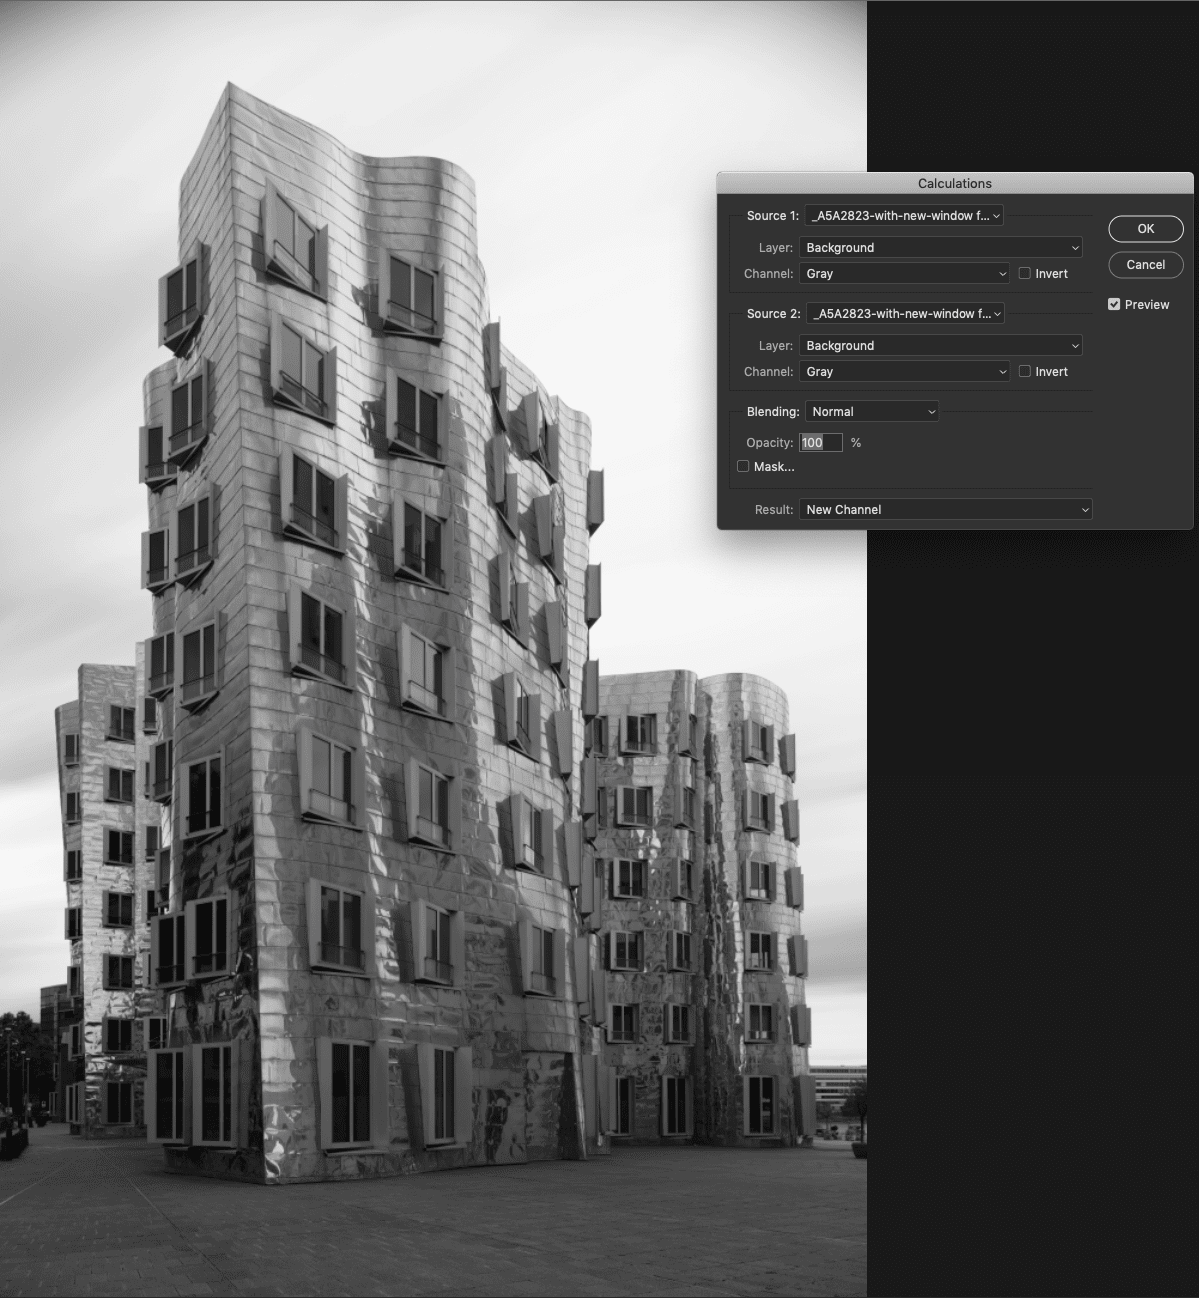
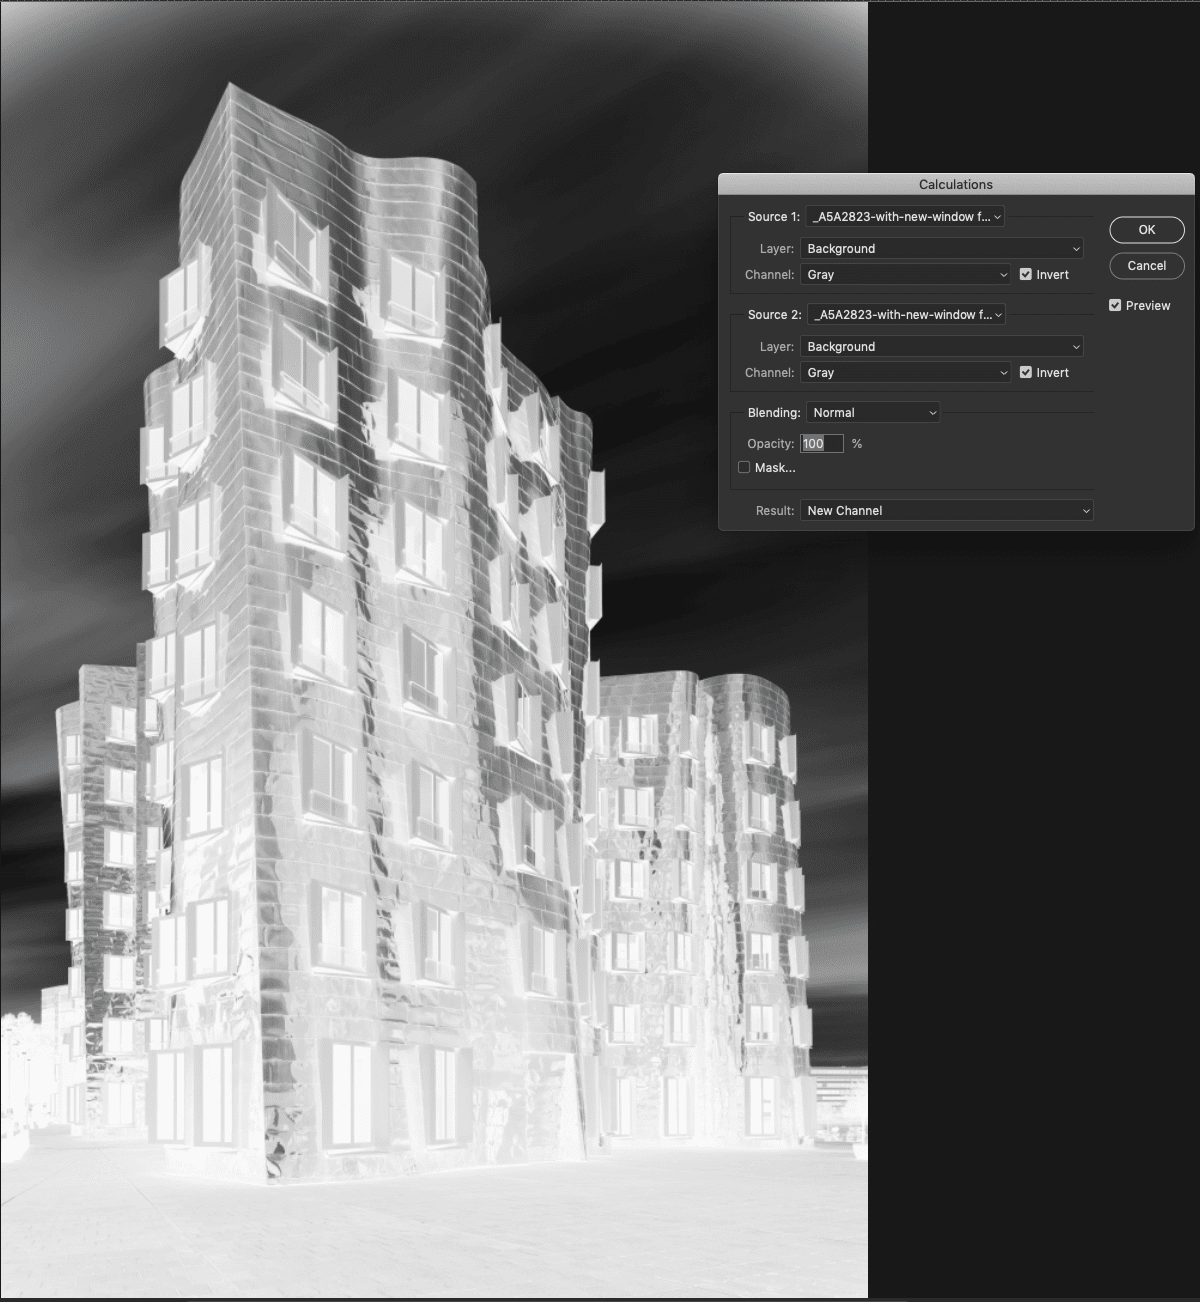
Below you will find the suggested sequence of creating 16-bit luminosity masks with integer values. There are variations on this, but they all come down to the same: start with either Lights1 or Darks1 or both, and then it’s easy to create the rest of the masks.
AN ALTERNATIVE 16-BIT METHOD WITH LEVELS AFTER THE INITIAL MASKS HAVE BEEN CREATED

The same procedure can now be followed to create the subsequent light luminosity masks to the next integer value, by ensuring you always use a copy of the preceding luminosity mask as the starting point for the new luminosity mask. Of course, the same procedure can be followed to create the new dark luminosity masks without the Calculation method.
CREATING ‘HALF’ LUMINOSITY MASKS IN 16 BITS

Creating half values in 16 bits
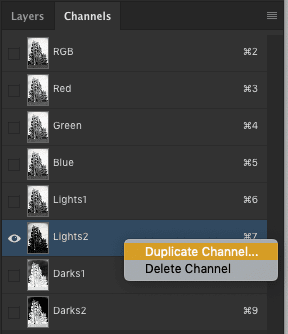
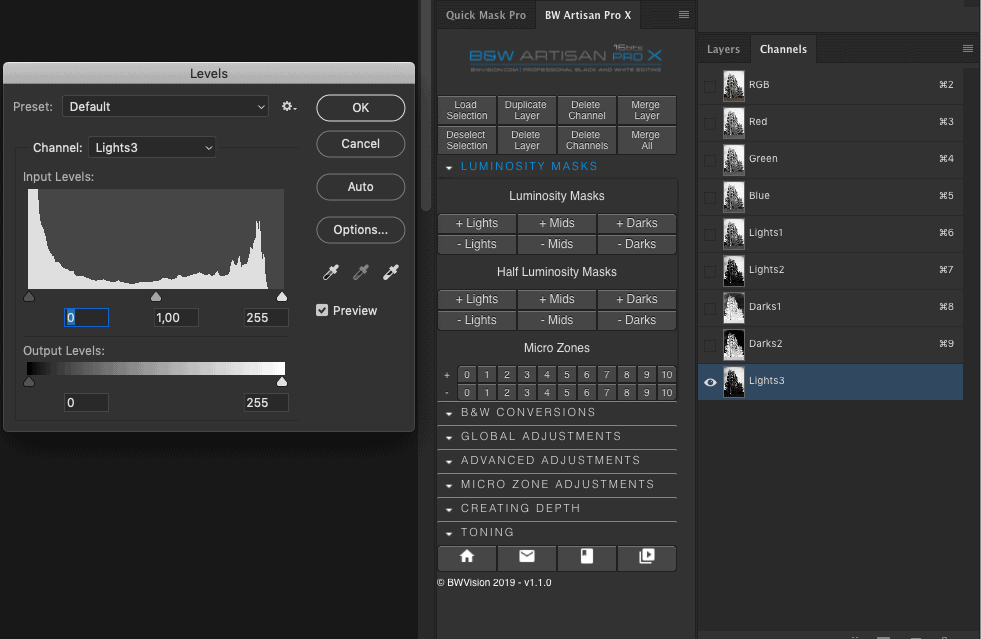
To create the luminosity masks with half values like Lights2.5, and preserve the 16-bit depth, we start out with the method to create the initial masks such as Lights1 or Darks1 described above, using calculations and then continue with the Levels method to arrive at the desired masks with half values or ‘full’ integer values. In this example, I’ve already created Lights2 and Lights3 masks using the 16-bit method, and I now also need the Lights2.5 mask as I find Lights2 too light and Lights3 too dark. All I need to do is to duplicate Lights2 and call it Lights2.5, the same way as described in the previous paragraph and then go to Image > Adjustments > Levels and instead of setting the Gamma value to 0.5 to arrive at the next Full value (Lights3), I set it to 0.75 and then click OK. By doing this I arrive at the next Half value: Lights2.5. This can be repeated for all other Half values, just by taking the preceding Full value and then adjust Gamma in levels with 0.75. Or, alternatively, to arrive at Lights3.5, you could also take Lights2.5, and then set the Gamma value in the Levels tool to 0.5 to arrive at the next Half value. Gamma value 0.75 always takes you a half value further, while Gamma value 0.5 takes you a full value further from any starting position.
MID TONE MASKS IN 16 BITS
CREATING THE MID TONE MASKS AFTER LIGHTS1 AND DARKS1 ARE CREATED
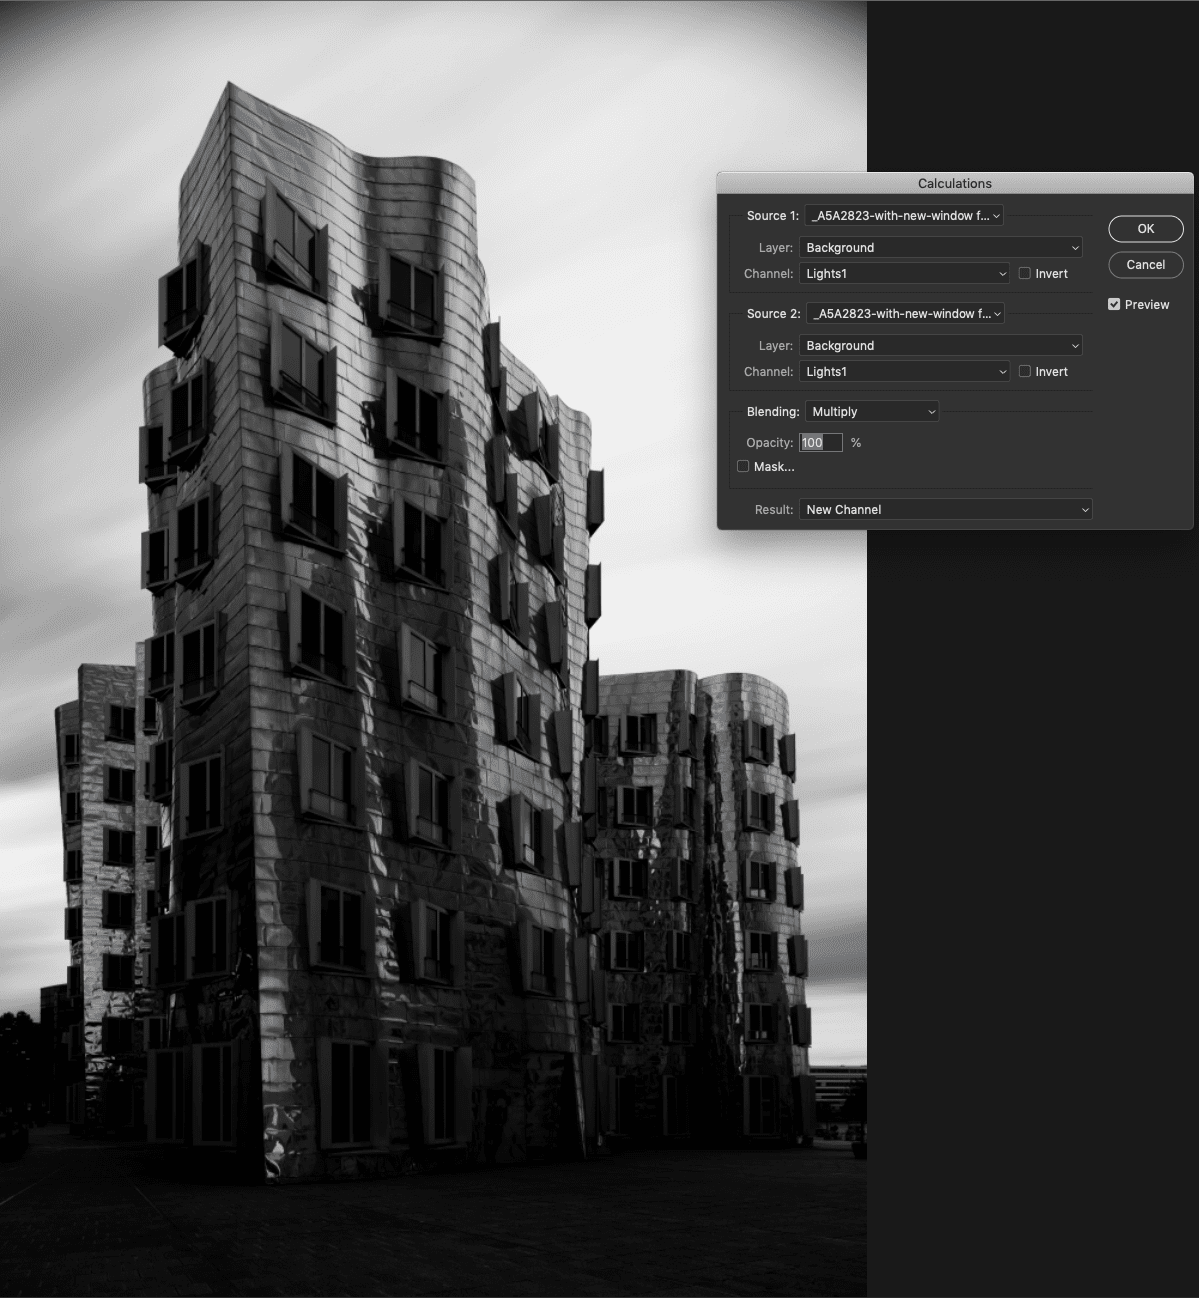
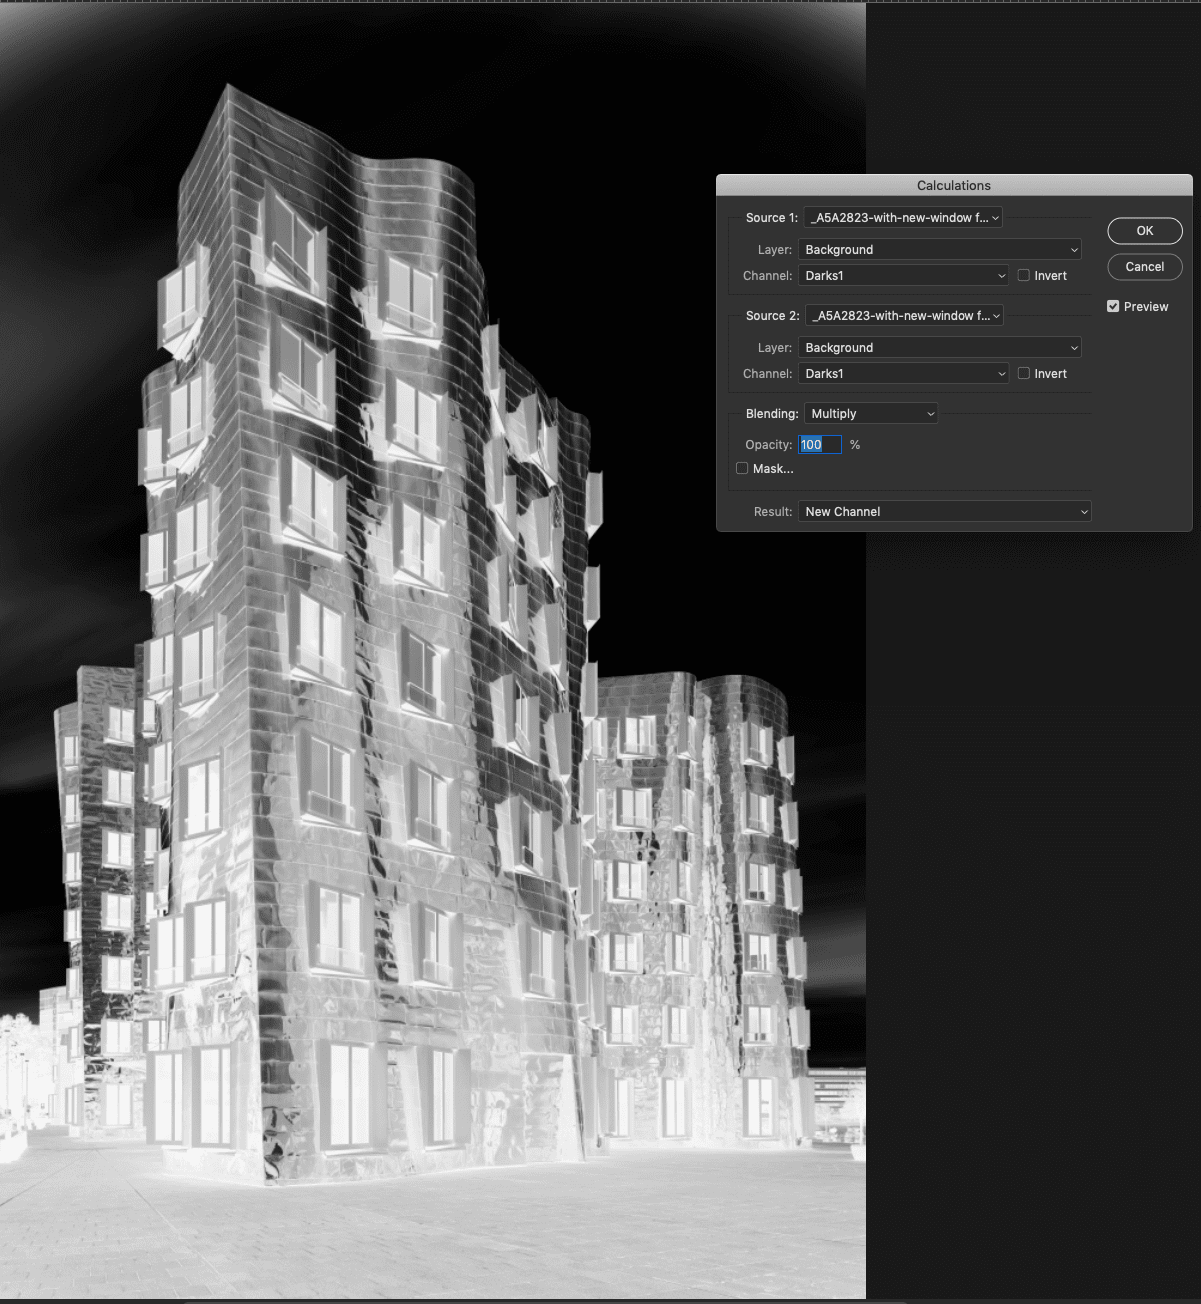
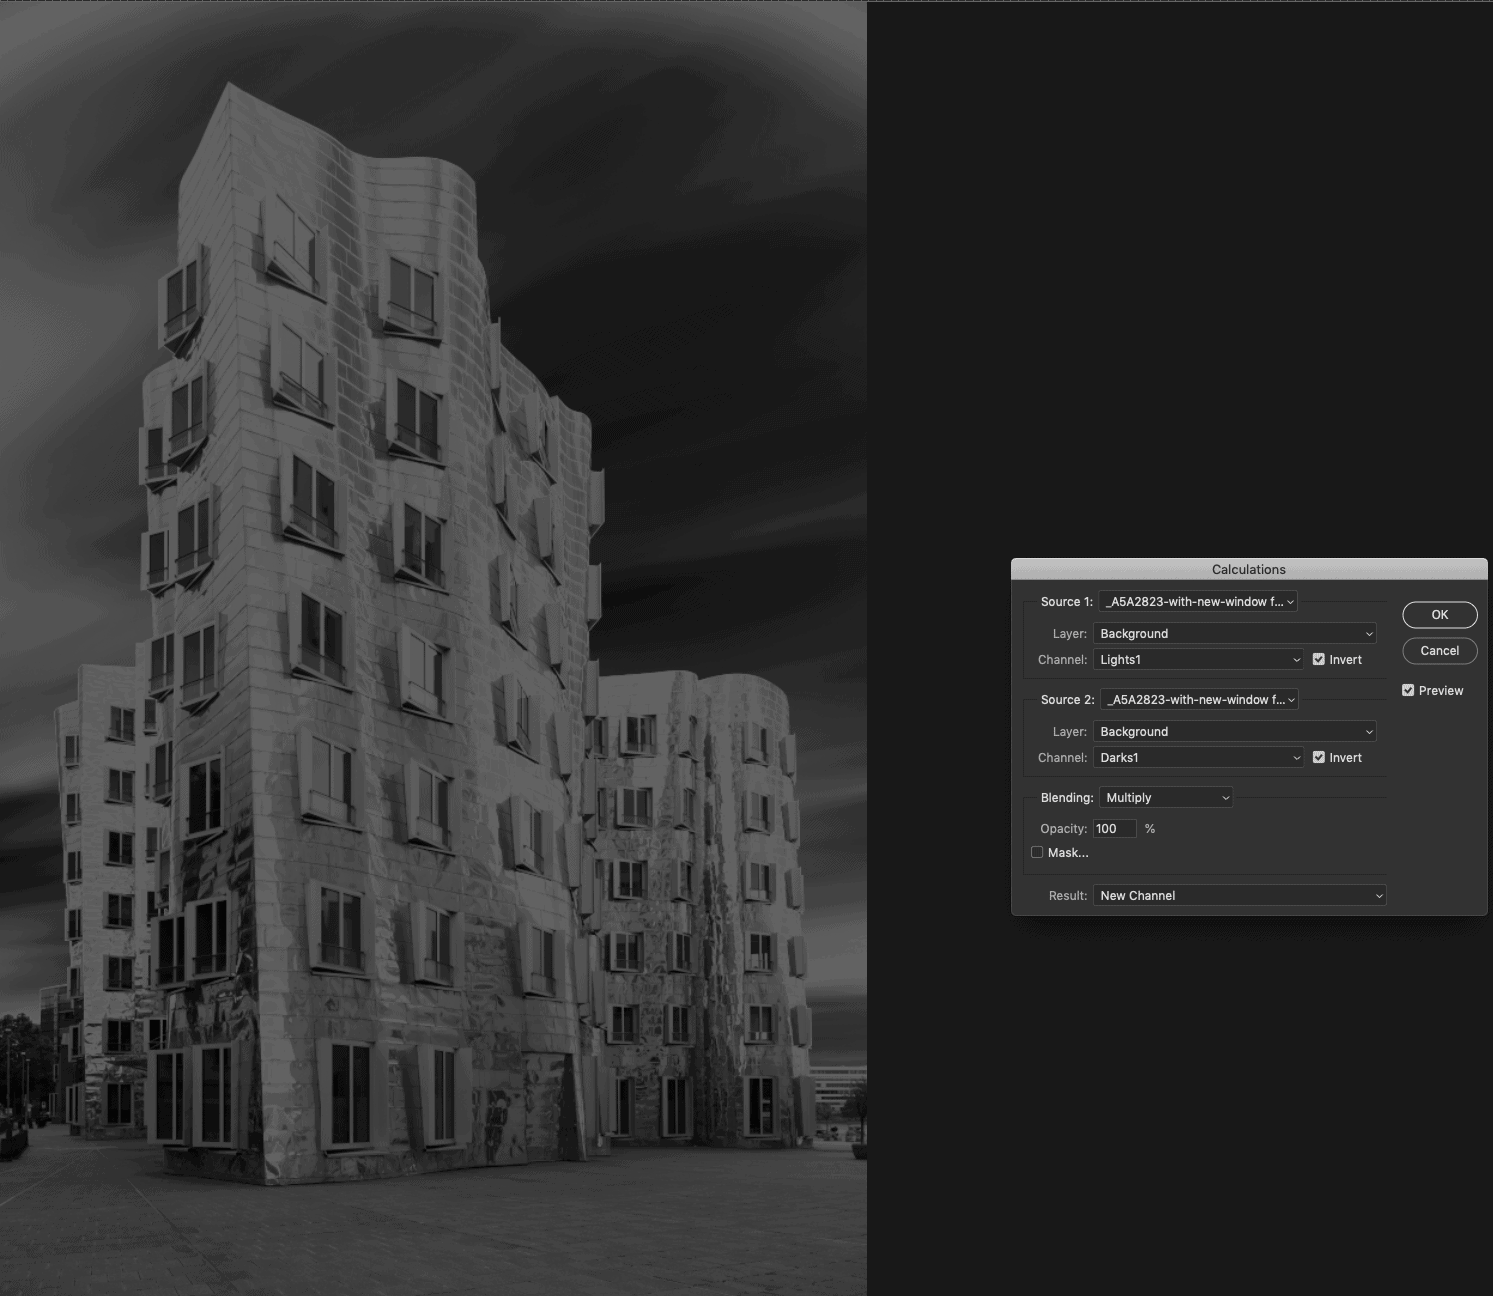
To create a mid-tone mask in 16 bits you have to create the Lights1 and Darks1 masks first following the 16-bit method with calculations and then simply continue with Calculations by loading Lights1 under Source 1 and Darks1 under Source 2 and then set Blending Mode to Multiply. I personally find the use of a Mid-tone 1 mask using Lights1 and Darks1 sufficient and I have never found a need to create a Mid-tone 2 mask. But if you want to create those, then simply create Lights2 and Darks2 first and then use the same Calculation settings. On a side note: I found out that there’s no difference if you create the mid-tone masks with the settings above while the invert boxes are checked or not. In case Lights1 Invert box is checked then it’s basically a Darks1, and if Darks1 invert is checked then it’s basically a Lights1. So it doesn’t make a difference.
FINAL THOUGHTS
Creating luminosity masks in 16 bits isn’t difficult and you can come to any in-between-integers value if you use different Gamma values. If 0.75 brings you to the next half value and 0.5 to the next full value then you can play with any other value between 0.5 and 1.00 to create 1/3, 1/4, etc. masks. It doesn’t matter how you call it, just know you can fine-tune the masks to your needs, even more, using the Gamma value in the Levels tool. Just try it.
Even if it’s not difficult, it is time-consuming to create the 16-bit masks manually, every time you need them. It’s better to create an action yourself or alternatively, you can buy my Artisan Pro X panel that takes care of all that automatically. But having said that, if you only buy my panel to create luminosity masks, you’re missing the point and purpose of my panel, and then there are better panels than my Artisan Pro X panel if you only care about creating luminosity masks. My Artisan Pro X panel is for creating B&W photos, the luminosity masks feature is just a bonus feature in my panel. And it is sufficient for 95% of your luminosity masking needs.
If you consider buying this panel, then know there’s also a discounted bundle available with the recently launched ‘Next Level B&W Fine art photography’ video, which also has an introduction discount.


One Response
First fo all, thank’s for sharing this procedure.
Regarding the part in wich we can create the mids tome mask, if we are creating the mids tone 1 mask (Lights1 * Darks1) give the right mask, but when I try with mids2 (Lights2 * Darks2) give me a black mask….. but if I inverted both it will give me the rigth mids tone mask, to resume, looks like general procedure for midtone mask could be:
MIds 1 = Invert(Ligths1) * Invert(Darks1)
Mids 2 = Invert(Ligths2) * Invert(Darks2)
and so on…
Best regards.