

Introduction
No these are not the best tips ever on the Internet like many blogposts are screaming, and pretending, only to see they state that you should shoot in RAW and expose to the right. No, these are just my five personal tips to improve your black and white photographs. And yes, you should always shoot in RAW and preferably expose to the right, but not always.
Tip 1: Post Process To Black And White Yourself, Not In Camera
Better black and white photographs are not created by the in-camera black and white conversion of images. Besides the fact that those black and white photographs are always JPG images and not RAW (with exception of the black and white photos of a few pure monochrome cameras such as the PhaseOne Achromatic), your artistic vision should never be overruled or limited by generic software algorithms created by the software programmer. You are the artist, so you should decide how a black and white photograph should look like. Post process your black and white images in Photoshop or other black and white photo software yourself and try to use your own individualized and personal workflow and don’t be afraid to do what you’re not supposed to do according to the ‘purists’. Ansel Adams never made it a secret that he post processed his images heavily in the darkroom to give full expression to his vision. Good black and white photographs are born in the minds of artists, not in a camera. Have a look at his famous Moonlight, Hernandez photograph and the video to get insight how Adams altered his images heavily.
Watch how Ansel Adams’ son describes how his father manipulated the original image in the darkroom to come up with something that was an expression of what Ansel Adams envisioned. Not what his camera gave him.
Tip 2: Luminosity Masks Are A Powerful Tool For Creative Editing
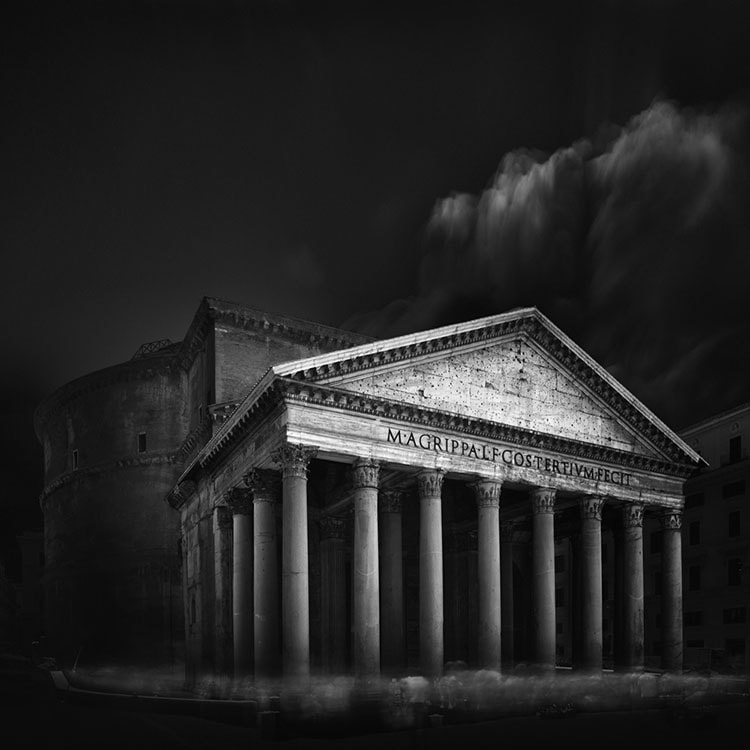
The luminosity masks as invented by Tony Kuyper are a must have in your post processing workflow, whether this is a black and white workflow or a color workflow, it will always improve the quality of post processing and it will give you control in a way that can’t be matched by any other tool in Photoshop or by any other photo software program. And it will even reveal details that you didn’t even know they were there. Below you will see an example of what luminosity masks can do. The original photograph as it came out of the camera appeared to have a blown out sky without any detail. But after importing the RAW file into Photoshop and creating the luminosity masks, they revealed all the dramatic clouds that were full of details. You can learn more on how I use luminosity masks in this tutorial and you can download an action set to automatically create luminosity masks here (new version). If you don’t know how to install them then read this article. Note that the downloadable action set in this last article has the old version of the action set. With the new version you can delete the luminosity masks with just the push of a button.

Tip 3: Dodging And Burning Are Nice Tools, But There Are Far Better Tools To Lighten And Darken Areas In Your Photo
Dodging and burning are the traditional ways to lighten or darken parts in your image: they were the most important tool in the analog darkroom and they are still an important tool in the digital darkroom. I would however recommend to use the curves tool in combination with layers and layer masks if you want more control over larger areas that need to be darkened/lightened and if you want more subtle results. Control and subtlety can be even more increased by using hard selections and soft selections (luminosity mask selections) to lighten and darken within specific selections only, and on top of that the gradient tool instead of the brush tool. Dodging and burning are still very useful to lighten or darken small details but you will save a lot of time and increase accuracy and subtlety by using curves tools in combination with masks for larger areas.

Tip 4: There’s More Between Heaven And Earth Than The Rule Of Thirds
Don’t be misled by all the well intended but ill informed critics who state that a well composed photograph should be composed with the Rule of Third in mind or with the Golden Ratio. Those are just a few of all the available composition techniques and in my view not even the best. Study the master painters and not only the master photographers how photographs can be composed in other, often better ways. Here’s a good article on how you can improve the composition in your photographs using more advanced composition techniques that are actually not so difficult to learn. There’s really more than just the Rule of Thirds.
Tip 5: Try To Make A Statement With Your Photographs
When you try to create black and white fine-art photographs then remember it’s not only about the visual style of your photograph, it’s not just aesthetics that will make your photo a fine-art photo. More important is the statement you make with the photograph. Whether this is an emotional statement or an intellectual statement or, even better, a combination of both, is less relevant. But that you make a statement and give content and meaning to an otherwise beautiful but shallow surface is the essence of anything considered to be art. Other visual artists like painters make statements on several levels all the time, that’s why their work is more easily identified as art, so why not make a statement with your photograph if you want it to be considered ‘art’? More on this in one of my upcoming articles where I will discuss what the essential ingredients are of this elusive thing called art.
One More Thing
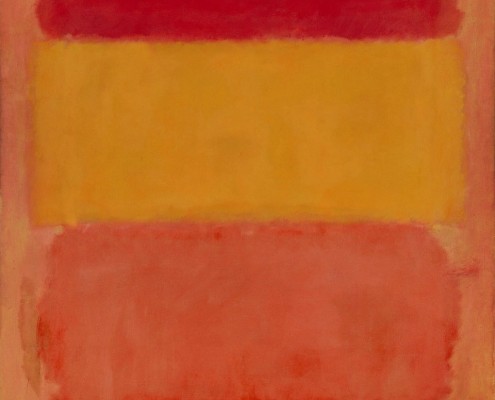
A final tip: unless you’re seeking for advice or critique yourself, don’t ever listen to unsolicited critique on your creations. Here’s what famous painter Mark Rothko said on critics and all of those out there who claim authority simply because they’re shooting photographs themselves:
The constant repetition of falsehood is more convincing than the demonstration of truth. It is understandable, then, how the artist might actually cultivate this moronic appearance, this deafness, this inarticulateness, in an effort to evade the million irrelevancies which daily accumulate concerning his work. For, while the authority of the doctor or plumber is never questioned, everyone deems himself a good judge and an adequate arbiter of what a work of art should be and how it should be done.
If you want to know more on my personal black and white processing method and use of luminosity masks in combination with layer masks, curves tool and gradient tool as mentioned in this article, then I can highly recommend reading either the 424 pages eBook From Basics to Fine Art – Black and white photography, architecture and beyond, written by me and co-author Julia Anna Gospodarou or watch my 3.5 hour B&W post processing Speed workflow tutorial that is all about my black and white photography post processing method.
12 Responses
Since art is taste – ie aesthetic opinion – it is too true that everyone should “deem himself a good judge and an adequate arbiter…etc”
I think that’s a correct statement Jack. But I think the artist shouldn’t be influenced by someone else’s ‘taste’.
I am so intrigued with your approach the results show a new view point on familiar images is that not the heart of photography?
So looking forward to Vienna.
Yes, it is the heart of photography, thanks David.
Thanks for a great post. I own your and Ms. Gospodarou’s book and am reading it now. I intend to try to learn your post processing techniques. When you are new to the practice of photography it is difficult to ignore others opinions especially when you participate in contests within a photography club but I know that it has to be done.
Thanks Again.
Tom
Tom, I completely agree: if you’re new then you will always listen to the opinion of others. And you will also try to emulate the work of photographers you like. That’s all very normal and the best and fastest way to learn something. But at some point when you know all the techniques, you will have to go your own way and make a statement.
Thank you Joel for sharing. Great tips: a combination of common sense and experience you acquire from your personal photography work and from your talks with students in your workshops. Very useful !
Thanks again Christophe!
Joel,
Your gracious freedom with your advice is a true gift. Thank you. I have the book and have taken a most beneficial tutorial with Julia Anna. Two years ago I bought a third-hand Leica Monochrom and dedicated last year and this to b&w photography and the difficult, frustrating and challenging search for a personal vision. I suspect that vision is not static but constantly evolves as the person learns and grows. Much as I falsely hope to arrive at a vision, I readily admit I will only partially and fleetingly glimpse an insight into what moves my heart and keeps the camera in my hand. Reading your postings helps me return to the quest. I plan to take your tutorial.
I have been unable to download the luminosity masks. I will keep trying.
Thanks again.
Matt
Thank you Matt. Don’t let anything discourage you in your search of your personal vision. With my tutorials I can teach you how to create photographs, that’s just technique, but I can’t teach you what you should photograph, because that is vision.
Joel
Been following you inspiring work for some time Joel,always different always fresh! Grateful indeed for your quality tutorials which have helped me progress the way I want to,and having seen your work printed large it’s right what you say,they are statement pieces and look totally different than on a screen,8 spruce street is just unbelievable when viewed in the flesh as it work,keep up the great work