

Foundational Adjustments in Post processing
There are certain types of image adjustments in Photoshop that can be done in various ways and are essential in that they form the most important basic adjustments for any good black and white or color photograph and are foundational. They are adjustments that every photographer/artist needs to be proficient at and at some point needs to master. Recurring adjustments that create the classic look in modern B&W images.
There is a variety of ways to do those foundational adjustments but only a few that deliver the most accurate and most subtle results in the fastest way. There are many wrong ways, and only a few good methods.
Artisan Pro designed around foundational adjustments
That premise was for me the starting point to develop the B&W Artisan Pro panel to automate those foundational adjustments and bring them together in easy to use presets in one place.
At the same time, I’m very aware that the Artisan Pro plugin has become software that has a steeper learning curve, due to the fact that it is also an educational tool. The panel forces you to not only be able to do foundational adjustments fast and accurately, but also WHY they need to be done in a specific way.
The plugin was never meant as just a smart photography tool, a brainless quick filter, for quick and nice results accessible to every incidental B&W photographer. No. It was developed to be the best black and white editing software with the best results for serious and dedicated B&W artists who only want the best and know they need to put the effort in it to learn not only the software but also the foundational principles underlying the software and what it does.
To make the panel just a bit easier to use I’ve created a schematic overview with the most important adjustments types and how to get the best results using a combination of adjustments in a given situation. Even though the overview table is designed for the Artisan Pro panel, the type of adjustments are also useful for those who don’t use the Artisan Pro software but only use Photoshop or other photo editing software. After all, the presets are based and constructed from basic Photoshop features and have names that are self-explanatory.
To make the mapping from presets and adjustments types to other software I have listed the most important below and outlined what they do and its principles
Outline of adjustment types
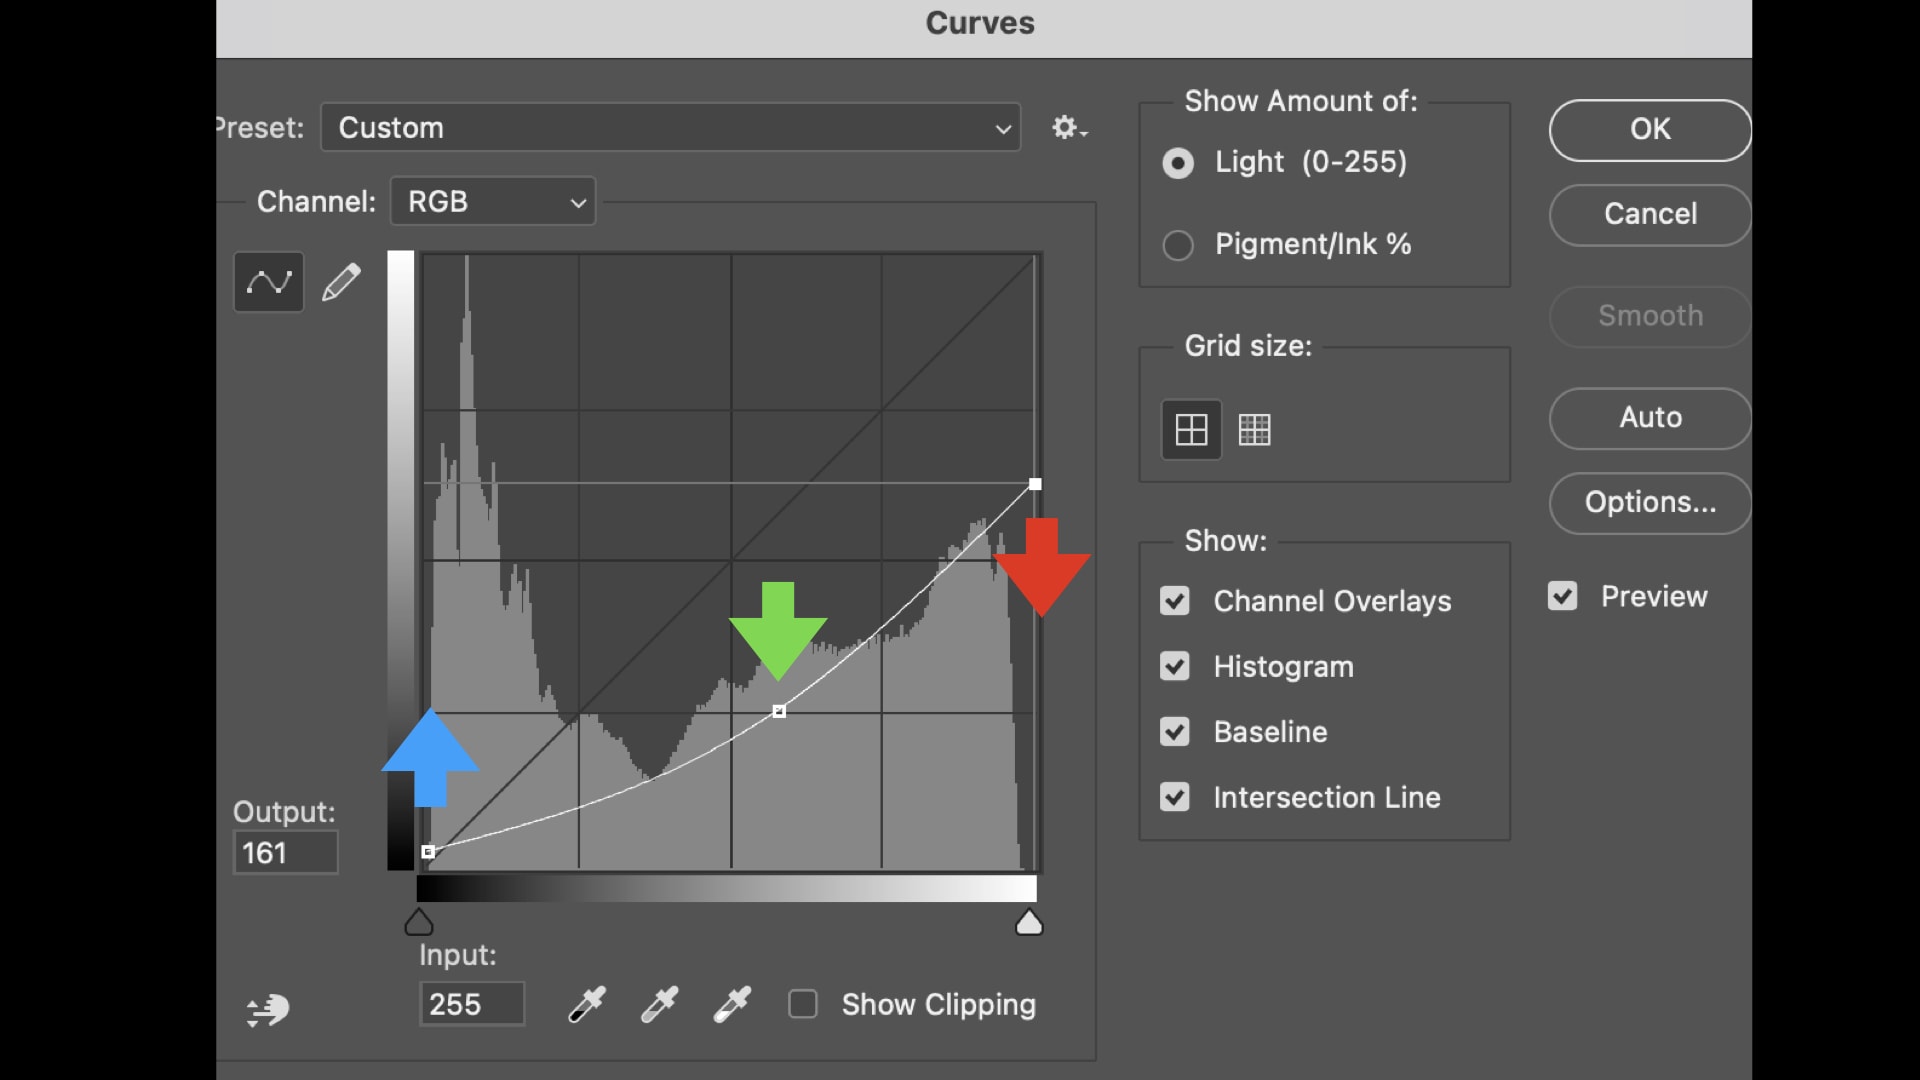
1. Remove Contrast – the removal contrast is foundational in my workflow and should be foundational in any workflow. Compare it with the painter needing to start on a blank or neutral canvas to not be distracted or predetermined in his creative vision. Flattening the contrasts and making the image neutral enables you to see more accurately what the specific image needs to materialize your artistic goal. The removal of contrast is typically done with the curves tool by ‘cutting off’ the highlights and at the same time pushing back the black point to lighter values. At the same time you can darken or lighten the adjustments. See example below for a Low Key adjustment with removal of contrast as it is built in the Artisan Pro plugin
2. Restore – the restore principle is another foundational adjustment in my workflow that enables me to do local adjustments that are strong but nevertheless always blend seamlessly with its adjacent areas. Always. No matter how small the local area, no matter how strong the adjustment. The restore is typically done by using layer masks in an adjustment layer on top of the layer prior to adjustment and then ‘restore’ the edges of an adjusted area using a gradient tool in such a way that non adjusted areas transitions seamlessly with the adjusted area.
Both adjustments listed above are demonstrated visually in this older video tutorial in which I demonstrated everything I do with the panel, automated these days, in a manual way that you can replicate in your own favorite editing tool.
3. Finally, the schematic overview mentions the technique of using wide range and narrow range luminosity masks to create depth. This is explained in various videos but this free YouTube video is a good demonstration of that principle.
Schematic Overview of Foundational Adjustments and Combinations
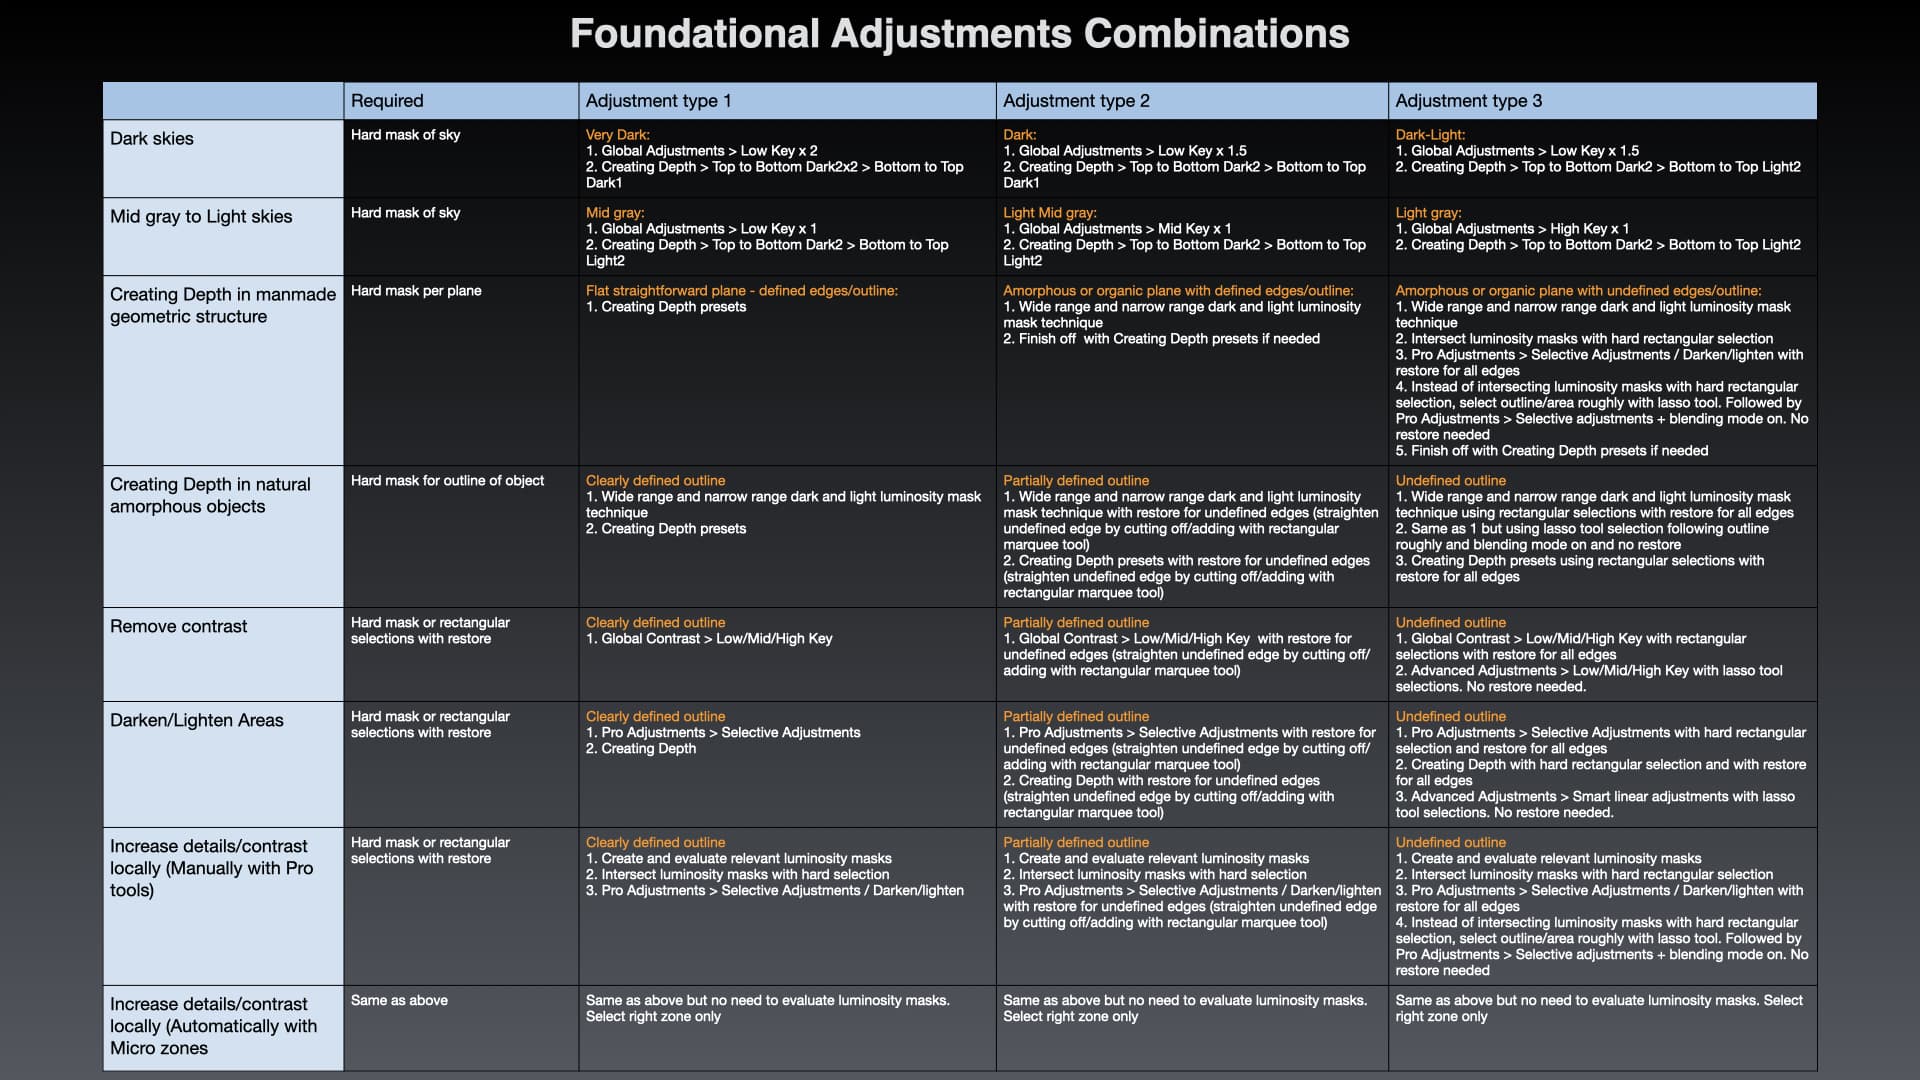
Open the image in Lightbox or right-mouse-click and download the image.
*IMPORTANT NOTES*
- Where I state Darks2 for example, I’m referring to Darken under Pro Tools > Selective adjustments, with an intensity of 2 (or darken with a Foreground to Transparent gradient in overlay mode with a percentage of 40%). Subsequently, where I state Lights1, I’m referring to Lighten under Pro Tools > Selective Adjustments with an intensity of 1 (or alternatively lighten with a Foreground to Transparent Gradient with a 20% percentage). Where I state Low Key x2 I’m suggesting to do 2 passes with the Low Key preset.
- The recommendations and suggestions are approximates and only meant as a rule of thumb to get an idea of the proportions and are therefore not absolute settings.
Finally, there’s a limited-time Cyber Monday discount of 40% OFF on all the plugins, valid until and including Cyber Monday, November 27, 2023.


