

Large Format Photography 1 – Getting Started – Equipment
INTRODUCTION
Before I kick off this series on Large Format Photography, there are a few things I need to clarify first.
It may seem a bit as a contradiction for my website, that has always been targeted at more advanced black and white fine art photographers, to find a blog post on ‘starting’ something. The reason is a simple one actually: I’ve always focused more on the artistic side and the digital post-processing side of black and white photography and the ‘genres’ within one can create fine-art photography. Much less on the gear side of it.
When starting large format photography, not only do we need to initially focus on the gear side but also on the process side of it as working with film, and especially with large format, is different than working with a digital camera or even with an analog medium format camera.
A few months ago when I announced to start writing on large format photography, I stated that I will be focusing on and advocate the hybrid workflow. Meaning, everything from the camera to the developing of negatives will be analog, and the final processing, including the print, will be within the digital workflow I’ve always recommended on my website. In Ansel Adams’ words, ‘The camera’ and ‘The Negative’ will be analog, ‘The Print’ will be digital. So the process side of large format photography will be a hybrid workflow where everything after developing the negatives will be the same as I always advocated in the articles on this website. This doesn’t mean that I disapprove of having a full analog workflow where also the processing with traditional dodging and burning techniques and the final print takes place entirely in the analog darkroom, it is just not what I prefer or like to advocate.
Finally, before getting to the essence of the series, a word on the debate between digital and analog photographers. Whenever I see a film photographer talking about digital photography, the film photographer often does this with a misplaced type of arrogance, sometimes bordering against disdain, towards digital photography. Too many times I notice that this attitude is based on very subjective ‘facts’ that are simply incorrect. I’m not going to take any sides in this series. Nor am I ever going to say that analog photographers are ‘real’ or ‘better’ photographers. But there’s a case against the average digital photographer whose ultimate goal is to have a large following on Instagram with photos, that aren’t an expression of an authentic feeling, but always an expression of a catchy tune that has proven to be a recipe for success and popularity. I like to think that analog photographer’s rejection of digital photography, is an aversion against those types of digital photographers, not so much against the medium itself. As for myself: I like both digital and analog photography. There are things I can’t do with a large format camera that I can do easily with a digital camera. Street photography for example. And there are things I can do with a large format that I can’t do with digital: portraits simply look different and are more deliberate and touching the essence. I will explain this in another part of this series why I think that is. But the thing I like most about analog photography in general, which is especially truer in large format photography, is that you need to slow down and be patient. Very patient. One of the reasons I like long exposure photography for example, is that it forces you to slow down. As a digital long exposure photographer, I very rarely create and publish more than 10 images a year. And when I go out shooting with my digital camera for an entire day, I would come home with on average 8 images. Consistently. I love the deliberate waiting-and-be-patient game in long exposure photography. Now, with large format photography, the entire shooting process till the moment I have it imported into Photoshop for the first time is doubled, perhaps even tripled. And then I’m talking about regular shots, not long exposure shots with the large format camera.

What you need: equipment and considerations
I want to kick off this series on large format photography at the very start: what do I need, equipment wise, when I want to consider taking up large format photography and what do I need to consider when shooting large format? Next up in this series will be articles on taking photographs with a large format camera, developing film, scanning and processing it. Also articles on how to shoot long exposure photographs with large format and using large format for architecture.
Considerations
- As mentioned before: you need to be patient, a lot more patient than with the slowest form of digital photography.
- You always have to slow down and be very deliberate about what you shoot and how you shoot it. So if you’re a photographer who relies on action and dynamics in photography, then think twice before taking up a large format camera. It’s not going to work, most of the times. If you’re a wedding photographer, then better don’t do it.
- There are 2 moments where your large format photo can fail: when taking the shot and when developing the negative. If you waste 1 shot of film, you’ve basically wasted a few hours of work and $5 per wasted shot on average.
- Large format film sheets don’t come cheap: a pack of 25 sheets of 4×5 film will cost you around $40 for film that’s easily available anywhere in the world. If you want Fuji’s famed Acros 100 film then you pay double that price for 20 sheets of film. If there’s a place where you can still get it, as they are discontinued since May 2018. I’m not even talking about 8×10 or even larger. 8×10 film is double the price of 4×5.
- Chemicals are not that expensive and you don’t need a real dark darkroom for developing film anymore. Unless you want to wet print your photos and want to go all the way analog.
- Large Format is especially great when shooting objects that are static and when you need ultimate control over depth of field: landscapes, architecture and still life. Also portraiture, but for different reasons than architecture or landscape. I will discuss that in a separate article.
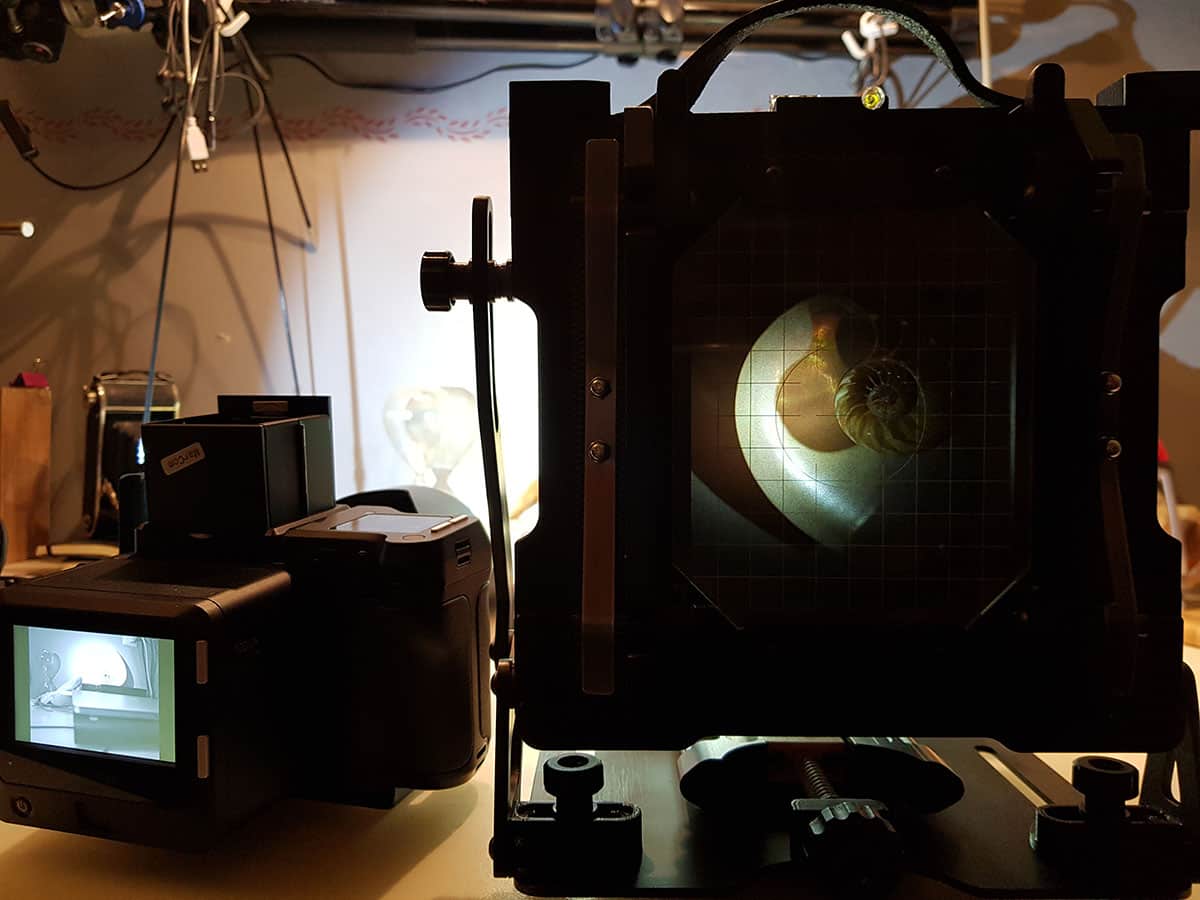
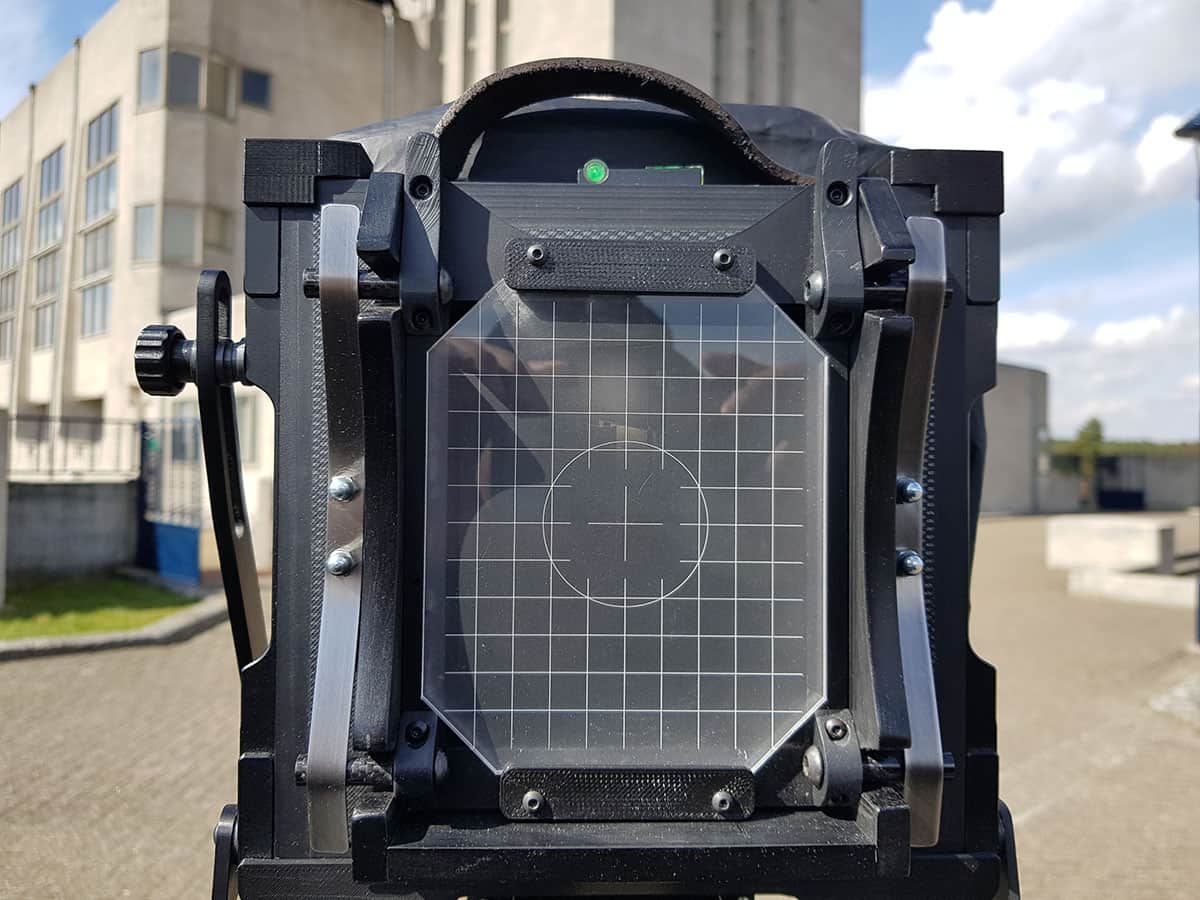
- Setting up a shot with a large format camera can be quite daunting and time-consuming. The most important reason for that is that you can’t see what you shoot through a viewfinder, let alone on an LCD display: you see everything through the ground-glass and you’ll see it upside down. Focusing is quite tedious as you do that by looking through the ground-glass while being covered underneath a dark cloth, with a focusing loupe. That is if you can see something at all. What you see through your ground-glass depends very much on the available light. Low-light and large format photography is a pain. So it’s a process of looking at your subject, go back under the dark cloth, zoom in with your focusing loupe, then focus by either moving the lens panel back and forth or by moving the film plane panel back and forth, or both, then look up again, back under the cloth and zoom in and focus again, etc. And now I’m talking about the focusing part only and composition. I haven’t yet discussed taking a light meter reading and determining the right exposure for your shot. Not as easy as with a digital camera! I will discuss this in a separate article. But before I can actually take the shot, it’s easily an hour later.
Equipment
A Large Format camera
Obviously, you need a large format camera. There are various formats, but large format starts with 4×5 (inches that is, for those who are used to other analog formats where the format is indicated in centimeters or millimeters) and go up from 5×7 to 8×10 to ultra large format sizes like 16×20 or even 20×24. The most common, and most affordable, sizes are 4×5 and 8×10. I would recommend starting with a 4×5 and perhaps sticking with that size as 8×10 large format makes it not only bigger and heavier to carry around, but the film and film holders are also much more expensive and harder to get by.
You could consider buying yourself a used camera on eBay or at the more traditional camera stores. Prices can vary from a few hundred dollars to thousands of dollars for a Linhof 4×5 Master Technika large format in good condition. But here’s a good, reliable and cheap alternative: Intrepid cameras in the UK are selling new 4×5 large format cameras for around four hundred dollars. They are an excellent deal and have been tried and proven by many experienced large format photographers like Ben Horne who were all very positive in their verdict. Here’s a video review of the 4×5 Intrepid Large format. Even their 8×10 large format is around $600.
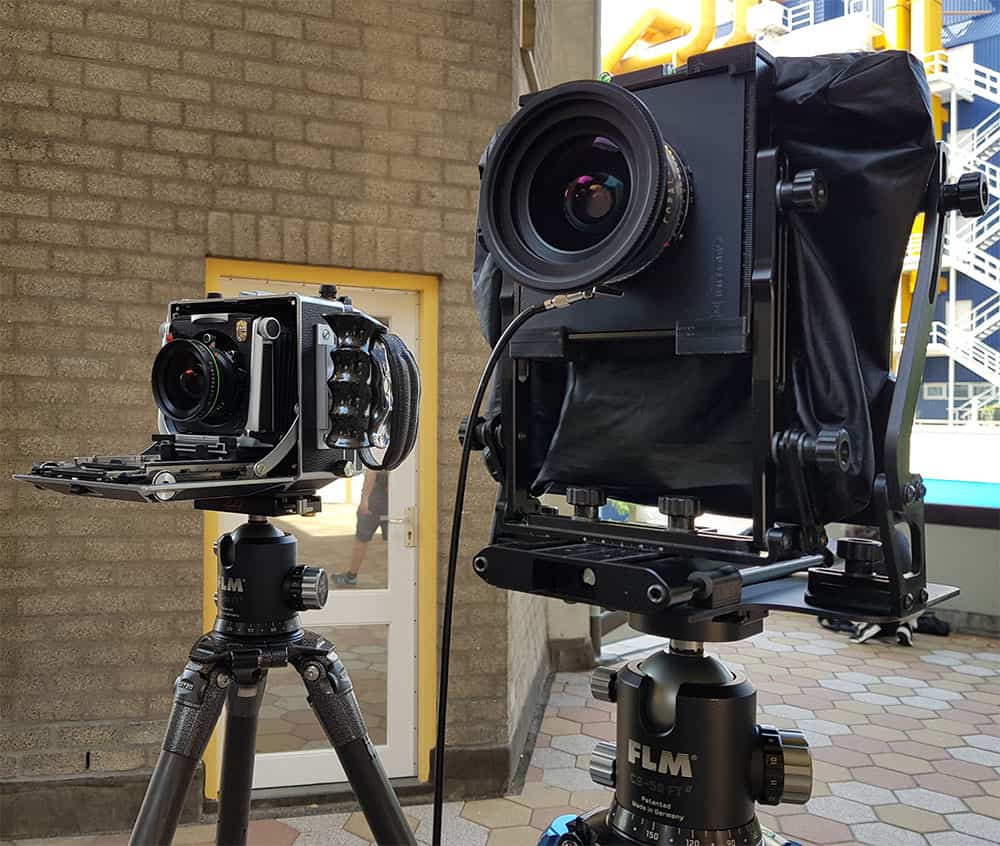
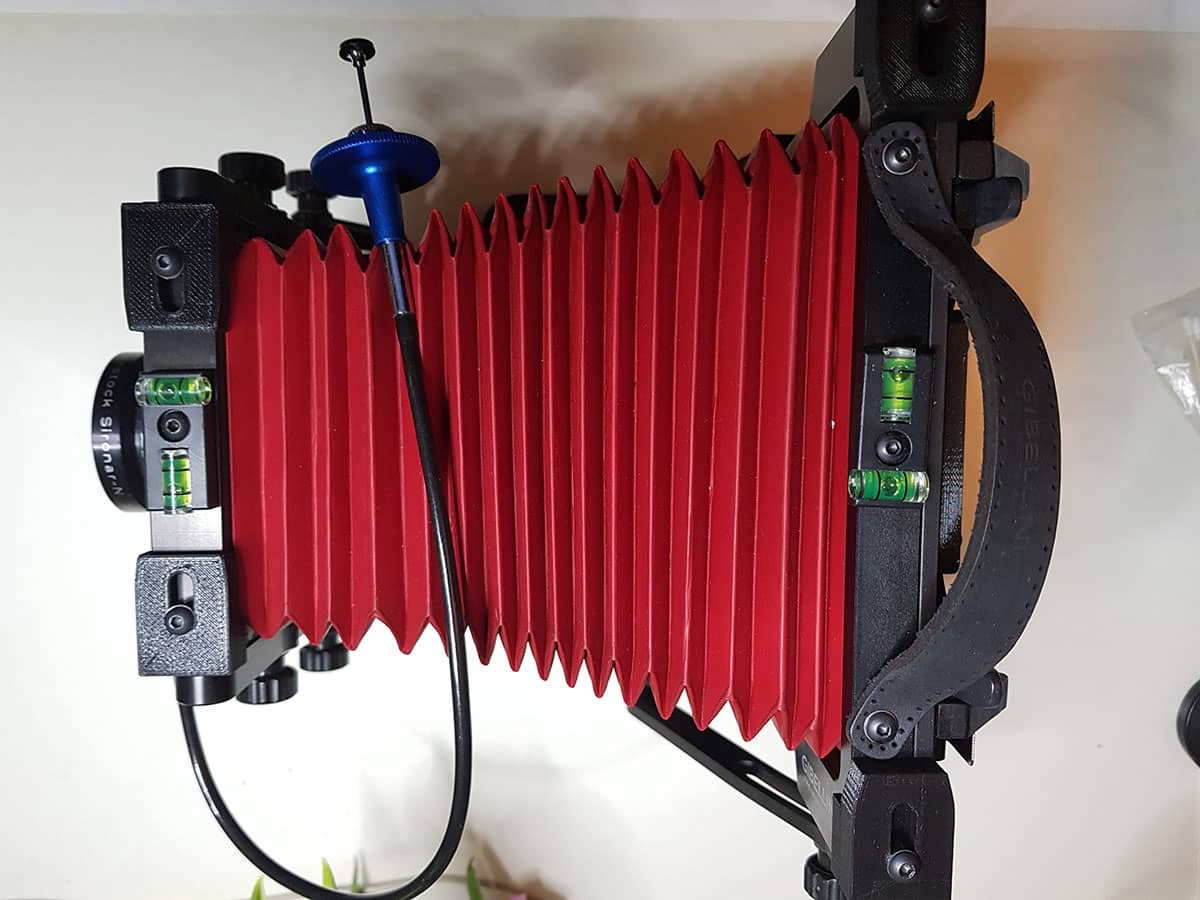
Below a few images from the new Intrepid 4×5 MK3 camera.
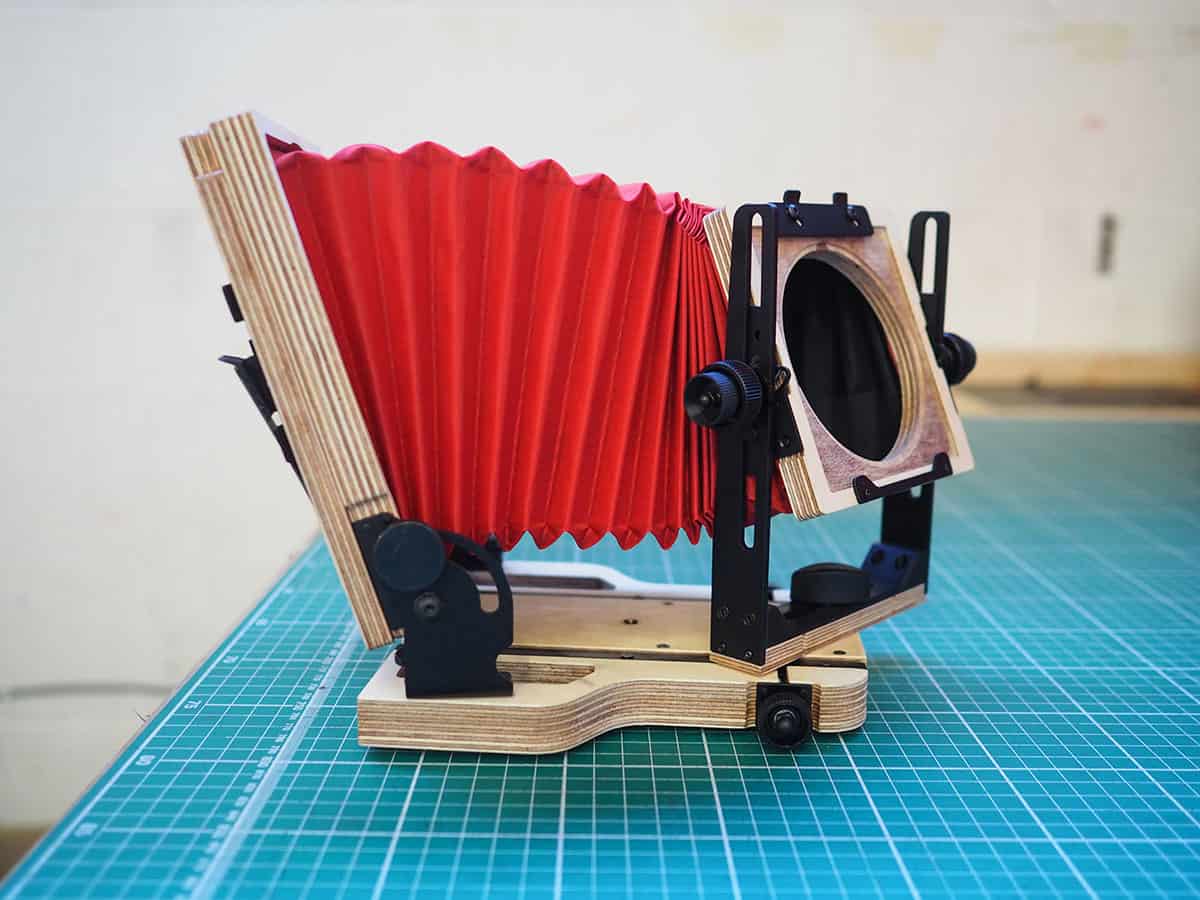

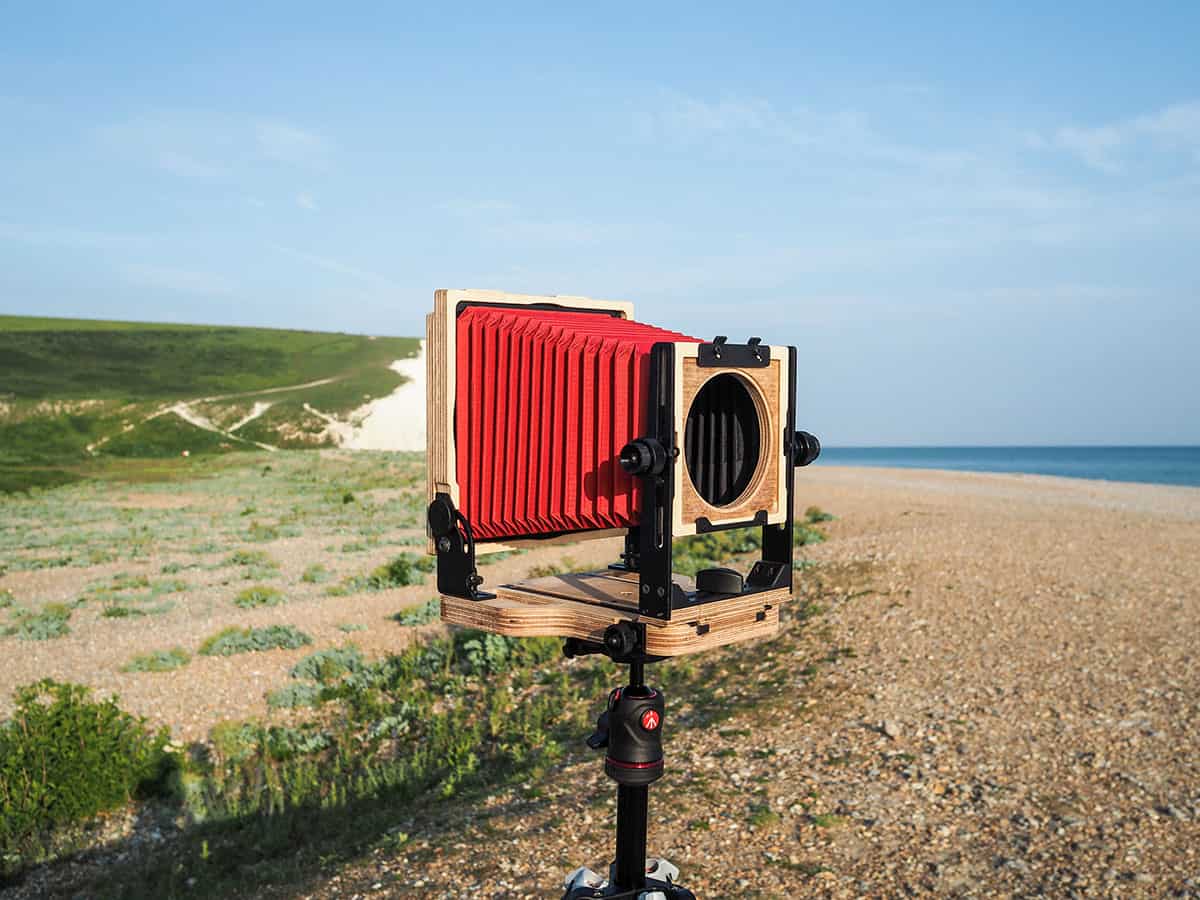
Of course, due to the low price, it may not look as good as, for example, a Linhof camera and it may seem not as sturdy and solid either. But in fact, it is very useable and reliable and it’s simply a very affordable way to get started with large format photography. A lot of value for your money and you don’t need to worry if you can trust that seller on eBay.
I’m using a 4×5 Gibellini camera myself, and I’m happy with how it performs and how it looks. If you buy a used large format camera, then make sure that the camera isn’t leaking light through the bellows for example. Also, take a look at the quality of the ground glass and if there aren’t any scratches on the glass. Not that it is very hard or expensive to get a replacement ground glass, but a proper scratch free ground glass is important. Most ground glasses are interchangeable as long as they use the so-called Graflok 45 mounting standard. The latter are things you don’t have to consider if you go for a new Intrepid 4×5 large format.
Lenses
Large format lenses are usually purchased as used lenses and are not expensive at all. You can get a good used Schneider or Rodenstock lens for a few hundred dollars. Lenses for large format cameras are different than the lenses we’re familiar with on a DSLR. It consists of a front element, a rear element, and a shutter. And unlike the DSLR or Medium format lenses, there’s no focusing ring as focusing takes places by moving the lens panel or film panel. But the lens, and more specifically, the shutter, contains all the controls, rings and levers, for adjusting the aperture, the shutter speed, cocking the shutter, opening the aperture blades for composing the shot and releasing the shutter. Usually, those lenses come with the Copal shutter. You can purchase them separately too, but if you’re starting then keep it simple and go for a lens that comes with the Copal or else the Compur shutter included as a whole. Shutters as the Copal and Compur shutters are worth an entire article but I won’t make it too technical here. Usually, you would need three different lenses to make good use of a large format camera: a wide-angle, a medium angle and a longer lens. But don’t think in terms of 17mm for a wide-angle lens on a large format camera as you need to use a factor 3 to come up with the equivalent lens for a 4×5 large format when you compare it with a digital full frame camera. I’m not talking about 8×10 or larger as that has a different factor. So wide-angle in 4×5 large format means you need to have something around 75mm, which is ideal for architecture and also landscapes. Then for the more all-around lens, you’d need the equivalent of 50mm on a full frame, which is a 150mm lens for large format. I use this for landscapes, and also for still life. Finally, the long lens on 4×5 large format is usually around 210mm. This is a good lens for portraiture. And those are exactly the lenses I have: a 75mm and 210mm Schneider lens and a 150mm Rodenstock, all with Copal and Compur shutters.

But you’re not done yet: you need to have the lens board to attach the lens to the camera. And it depends on the camera what size lens board you need. Therefore, if possible, try to find a lens complete with lens board that will fit your camera or else buy the lens board separately from the same brand as your camera but then you have to make sure that the lens will fit onto the board. Decisive for that is the size of the Copal shutter: #0, #1 or #3. Intrepid cameras have made it easy when you buy their 4×5 as they also sell lens boards for the Intrepid 4×5 that will fit all Copal shutter sizes.

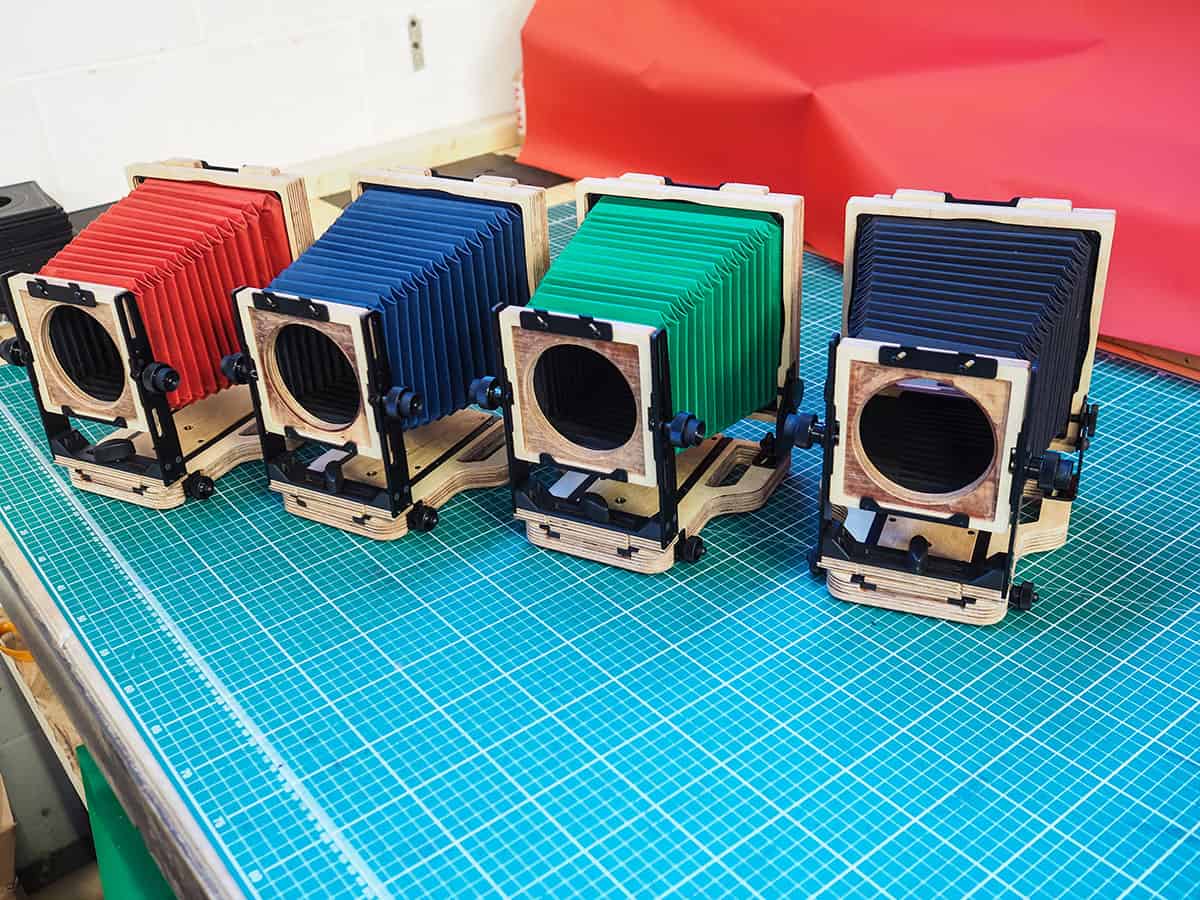
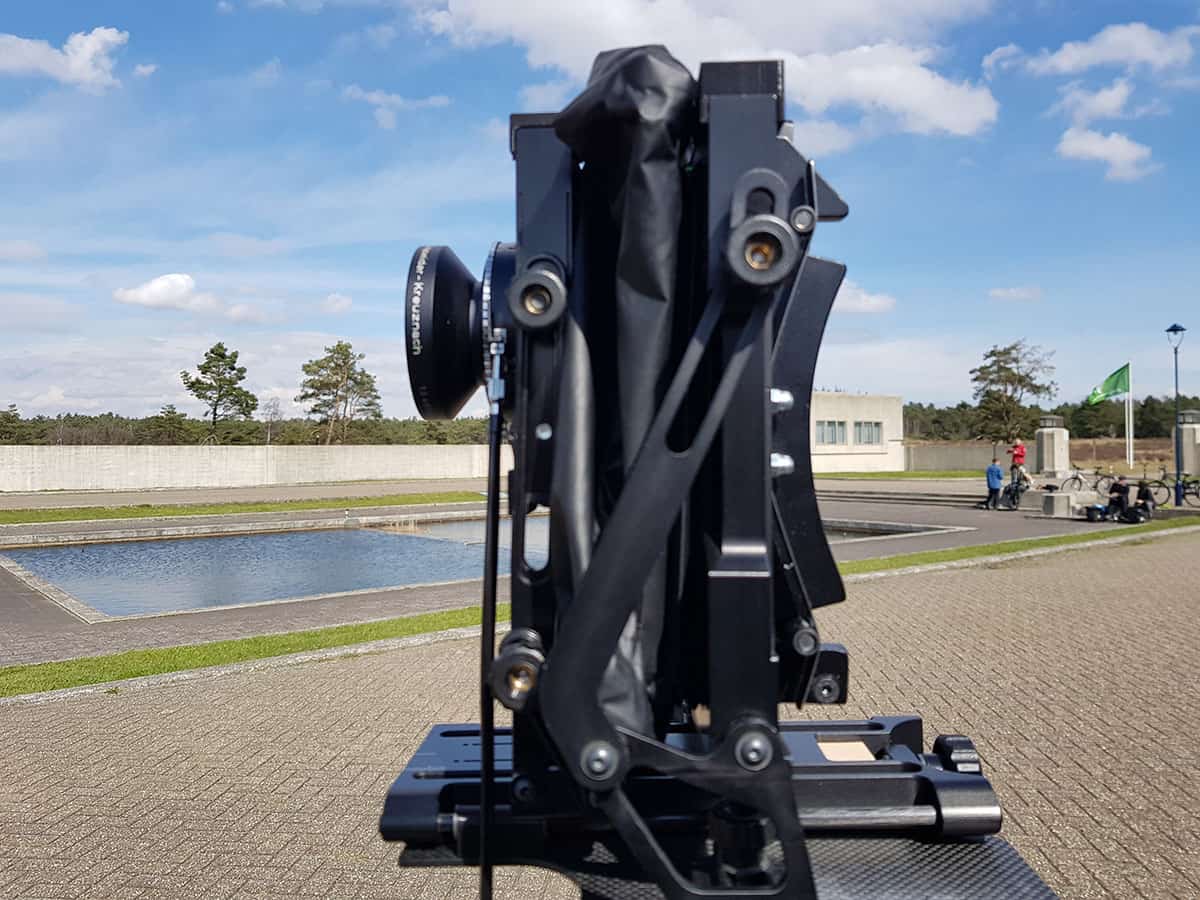
Bellows
Not all large format cameras come with two bellows but I have the standard bellows for the medium and the longer lens and a bellows for wide-angle lenses that gives you more room for lens movements as the lens is closer to the film panel. It is not always necessary though as it depends on the type of camera, lens and what you do with it.
Film and film holders
As mentioned earlier, 4×5 large format film sheets are not cheap. Which film you need depends on your personal preferences and the type of photos you want to shoot. I typically have two types of film: ISO100 and ISO400 film. I would use the ISO100 film for landscapes and architecture, while I would use the ISO400 film for still life and portraiture. But you can also use ISO100 for that of course. Just keep in mind that your large format camera needs more light than a digital camera. The reason for that is that an aperture of f/8 is considered a medium aperture, not too wide, not too small for a DSLR, but it is considered a wide aperture, hence resulting in a small depth of field, in large format photography. The widest aperture for large format is usually f/5.6 and you basically only use that widest aperture when you compose the shot and need more light to reach your ground glass. For shooting, you need to stop down to something between f/16 and f/22, to have a similar depth of field as with f/8 on a DSLR, with large format. This also means that you have less light and hence exposure times will increase. And that may not be a problem for shooting still life, but it is a problem for portraiture. On top of all this, you will have to account for reciprocity failure of the film. Meaning, there will be an extended exposure time equal to the recommended reciprocity failure correction which will make the exposure time most of the times too long for portraiture. Reciprocity failure correction sounds complex but it is not that difficult. We will talk more about this in one of the next blog posts on large format film as it also has consequences for developing the negatives, but most of the times the manufacturer of film, let’s say Kodak for their T-max 100 film provides data sheets with the recommended reciprocity correction at a given exposure time.
The film sheets need to be loaded into a film holder. A film holder can take 2 film sheets so you have 2 shots per film holder. If you’re out shooting in the field then this means you would need at least 5 or 6 preloaded film holders so you can at least take 10 or more shots. You can also load and change film holders in the field which means you need to bring your film changing bag or tent. Which is something I would not recommend doing. Again, more on this and how to change film for your film holder, in upcoming articles. Film holders for 4×5 are reasonably priced, especially if you look for used film-holders on eBay. But here are a few that are good and to get an idea of the price and how they look like: Fidelity film holders or the Toyo holders. I have 6 Lisco film holders and I’m still awaiting my 6 new Gibellini 4×5 film holders to make it 12. That is usually enough to shoot without interruption.

Recommendations for B&W film:
The following recommendations are highly personal, but it’s to give you an impression of how one could use different types of film.
- General use and long exposure photography: Fuji Acros 100. This film has minimal reciprocity failure but unfortunately, production of this film has been discontinued since May of 2018. You can still get them if you look good enough but they come with a very high price if you find one. Meaning, 20 sheets for around $90.
- General use and long exposure photography: Kodak Tmax 100. The choice of film of many great names in large format photography and I use it too. Its reciprocity failure characteristics are quite good too, but more correction is required.
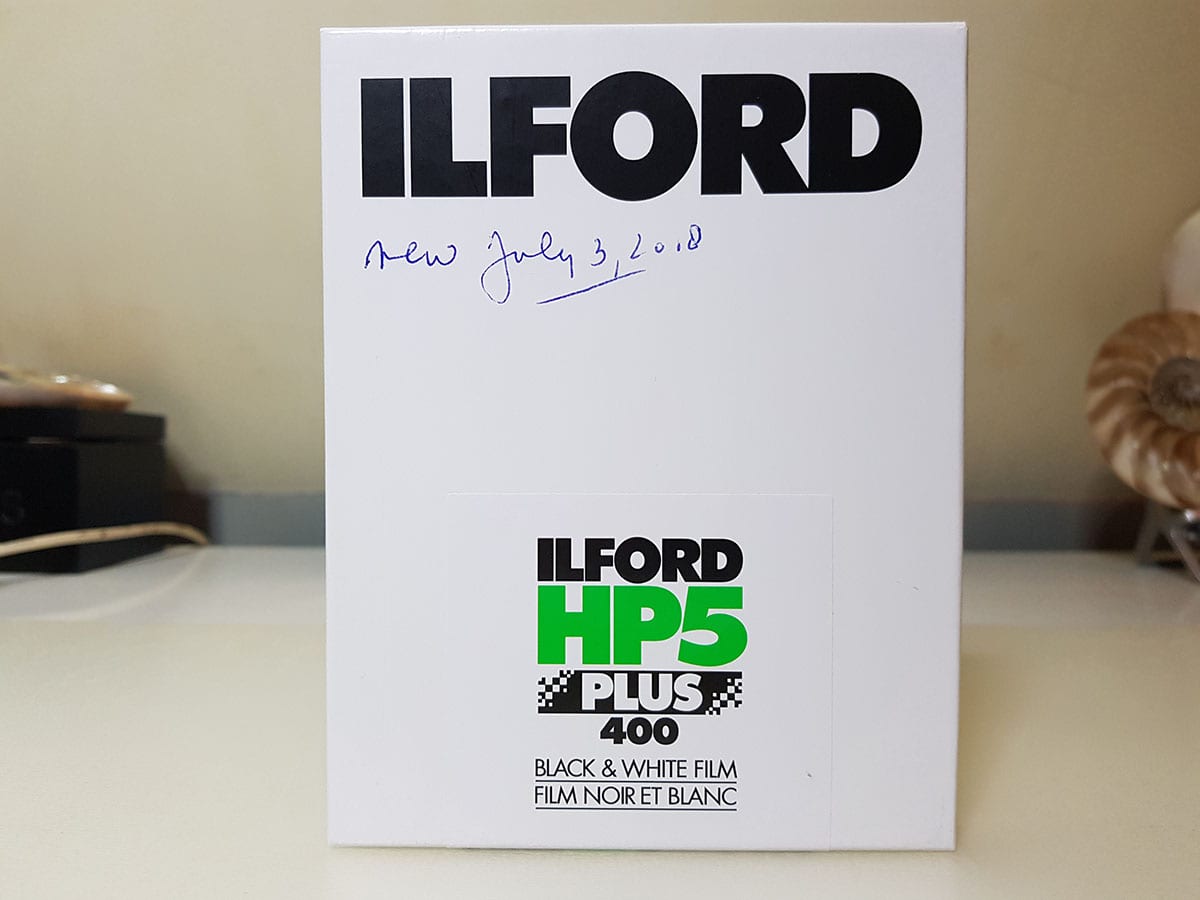
- Portraiture, still life and low-light photography: Ilford HP5 plus 400 – I personally love this film and especially the subtle contrasts.
Developing accessories
I’m one who prefers to develop film himself but if you have it done by a lab, then go ahead, but you miss out on some of the fun. At least, I think it adds to the experience personally. If you want to develop negatives yourself (again, I’m not talking about the process of darkroom printing) then you would need the following. Note that you don’t need a darkroom anymore these days if you only develop the negatives.
- A film changing bag: I have a small changing bag for loading film sheets into the film holder and for unloading them and put the exposed film into the development tank without exposing them to light, but it’s frustrating. It is just too small most of the times. So I’d definitely recommend a changing tent like the Harrison that gives you more room and comfort when changing film, but it’s a bit more expensive.
- For developing the film I have the Stearman Press Sp-445 developing tank that can take 4 sheets of film at the same time. See the image below. There are other affordable options like the Paterson or more sophisticated options like the Jobo system but they are not cheap.

Developing Chemicals
There’s quite a lot to choose from but you need at least a developing agent, a stop bath, and a fixer. Optionally you could also use a wetting agent to dry your film without any drying marks or streaks.
- Developer for B&W film. There’s Rodinal which is the one I use. Other good developers are ID-11 from Ilford or Kodak’s D76 – Just try it out and see what works for you, as different developers result in different negatives with the same type of film. But any of the ones mentioned here are good developers to start with and you may even conclude to stick with just one of them for the rest of your film life.
- Stop bath like Ilford’s Ilfostop – the type of stop bath isn’t as critical for the end result as the developers are. So just buy any well-known brand and you should always be good.
- Fixer: I’m using Ilford’s fixer – the same as for the stop bath: it isn’t as critical as the developing agent for the end result.
Focusing Loupe
You definitely need a focusing loupe to compose your shot and to zoom in. Here are a few recommendations
Lightmeter
Taking a meter reading on a DSLR or any other digital camera is something we do routinely and effortlessly. It’s a different thing with a large format camera. You do everything manually, and you calculate the right exposure manually based on middle gray. This will be discussed in an upcoming article on shooting with large format. I’m using this Sekonic Litemaster Pro L-478DR lightmeter with a Sekonic Spot Viewfinder. And this lightmeter isn’t only useful when shooting large format, it gives also a more accurate meter reading when shooting digital.Mechanical release cable:
You need a mechanical release shutter cable too, I have a cheap one that works just fine and this is a more expensive one. Just make sure they’re not too long, I prefer to have a short one that won’t get stuck. You won’t have the luxury of wireless shutter releases but there’s something about working with equipment that’s entirely mechanical.
Scanners
Finally, if you go for a hybrid workflow, which I would recommend, then you need a good scanner to scan the negatives. Epson arguably produces the best scanners. I have an Epson v800 scanner that easily produces 180MP files from my 4×5 negatives and the latest is the Epson V850. An entire series of blog posts can be dedicated to the scanning part only but for now, I will add that those scanners will do more than a great job for your negatives. If you want even better scans then drum scanning your negatives gives superior results. But drum scanners are simply not affordable, so if you want to have your negatives drum scanned, then find yourself a lab that can do that, but even having the drum scanning done by a lab comes with a price.


20 Responses
Joel,
an excellent outline of getting started in large format! I have a Chamonix 45N2 which I love, but agree with your suggestion of the Intrepid cameras (not available when I got one). It is nice to see a thoughtful article like this coming across the web these days, keeping it simple. I look forward to reading more in the future- thank you.
Rick
I’m happy you liked it Rick – there’s actually a lot of information on the Internet but it’s scattered. I hope I can contribute to making it more accessible. Thank you.
I went to photography school back in the 70’s for commercial / industrial / architectural photography. We learned on the 4×5 sheet film camera. In my opinion, it is the best way to “learn” what photography is.
Thanks Jeffrey – it is a very pure way of learning photography and I think a combination of digital and analog is giving me the best of both worlds.
Back in the days of me education becoming a professional photographer, I owned a 4×5 Linhoff, I so very much enjoyed working with it, especially with transparencies, they all were cut sharp images. After about 15 years later I had to sell it and exchanged it to my first digital. I still miss those days of working with my 4×5.
Cornelia, then maybe you should consider picking it up again. I do experience and enjoy photography now in a different way, which I think will contribute to your creativity. It’s like walking through a beautiful landscape instead of driving through it with your car. It’s more intense. Thank you.
Thank you for your kind response, Joel, I couldn’t agree with you more about the joy of experiencing photography in a different way, yet as I am getting older, carrying around a heavier 4×5 is getting harder on me and my bones. Meanwhile I will enjoy viewing your beautiful work. Thank you though. Cornelia
Hi Joel,
Thank you for such a great article. I’ve been contemplating to work with a film camera someday for the very reason that I can slow down and enjoy the entire process.
I want to also thank you for inspiring me to write in-depth articles and very thought-provoking ones like you do. I have been blogging about nature photography for 5 years and I thought i did a good job, but not anymore. Thanks to you!
You and Julia have inspired me beyond any words that I can describe.
I wish you more success and joy!
Best Regards,
Prathap
Many thanks Prathap and happy to hear those beautiful words. Many people would advise you to write very frequent, short, blog posts just from an SEO point of view, and even though that is one approach that works, it’s not the only approach, and certainly not the best approach if this doesn’t suit your way of communication and personality. There are so many other bloggers who write very elaborate and in-depth articles and post just every two months and not only do they reach a huge audience but they also touch their hearts because they write with enthusiasm and with passion. I chose to do the latter because I can’t do it any other way. Good luck and joy to you too!
What a well-done introduction. Thank you Joel! Your new website implementation is attractive, accessible and functional.
Glad you like it Frank – I keep on improving the website visually but also articles will be even more elaborate and in-depth. Thanks.
Well that has set the cat amongst the pigeons! I was all set to return to digital photography than I read your article, the upshot being that I am now thinking about LF. I am not new to film, having shot Mamiya 6×7 in the past but LF seems to be a whole new level of complexity.
I look forward to reading the rest of your articles on this before I jump in with both feet. Love the new site by the way.
Glad to hear that Errol – LF is indeed different and actually more fun too. What I’ve noticed is that people are far more approachable when you approach them with an ‘antique’ camera as they refer to it. So there’s also an upside to LF!
Joel,
i worked as a scanneroperator on Linotype Hell Drumscanners from 1990-2005. We avoided to scan negatives because of the bad gradation of the scans. Slides and transparancies were superb.
Before you try to scan your 4×5 negatives with a epson scanner, try to photograph them with a good macrolens or an enlargerobjective in retromount. You only need to lay them flat on a good lighttable and you need a sturdy reprostand or tripod for a good digital camera.
Fotos of a negative in 40-50 mp (or more if you go mediumformat) are far superior to flatbedscanns with a epson 850.
Do not forget to mask the negatives with a black passepartout against flare.
You will like the “scans” and you are much faster…;-)
Thank you for the tip. I’m not unhappy with the scanner results but I’m going to explore your suggestion.
Joel
Glad to see your still working with 4×5. I just started using a 2-bath pyrocat developer that allows one to expose for the shadows and retain highlight detail. I’m interested to see more images of your work with 4×5 film. I too use the sp-445 tank to develop film, but soon will be moving to tray development for more critical shots. The V850 with the Betterscanning wet scan holder is awesome. I just hate dust! Keep it going.
Joel, I’m just dipping in to your site here (I’m searching on articles just like this as I’m also coming back into large format and plan to work in a ‘hybrid’ way as well—making the original image on film, scanning on an Imacon and then processing/printing digitally). Do you plan to replicate the look of your digital work with the film capture? If so, I’m curious to know how you will reproduce the deep sky tones and etc. that you are able to produce with channel-based conversion from colour to BW in digital capture? Is there any benefit to using colour film and then converting the channel information to BW as with digital? Would you use ‘traditional’ colour contrast filters on film to get the tones you are looking for in camera?
Jason, thanks for the comment and happy you found my website. First off, I’m not sure what you mean with channel based conversion. If you mean with that, that I’m using the original color channels or original color information to convert to B&W, then that’s not correct. My B&W conversion and editing, as it is reflected in my manual workflow, is completely independent of the color information, it’s purely luminance based conversion and editing. I’m a firm believer that B&W editing and conversion should be completely color independent as it is only distracting information, and in the case of digital color to digital B&W, it is also interpolated information that depreciates the end result. That philosophy is also reflected in my software panels for Photoshop: the B&W Artisan Pro panel is pure luminance based. This means it can be used for native color and native B&W digital RAW files such as the PhaseOne achromatic, or a digitally scanned file from B&W film. The only benefit to using color film as a source file for a B&W result, is that it gives you additional information (the hues) to more easily isolate objects. E.g. a purely blue sky gives you extra information to mask the sky using color range tools in Photoshop, providing the blue doesn’t occur anywhere else in the photo. But it doesn’t give you better B&W images nor does it make B&W editing easier. At times it may seem that it is easier to use color information to affect a specific tonality using PS channel sliders for example, but that’s a wrong approach of what B&W is or should be, and in the case of digital color also use of interpolated information that decreases the quality and accuracy. B&W is the representation of the world in luminance values, so any approach that doesn’t use (artificially) added information like color, is a more direct and effective approach, and often higher in quality. If you do it right. I’ve rarely used contrast filters to get the look that I wanted. I personally find adjusting the contrasts manually gives me infinitely more control.
Joel
Ah, I think I need to read your book! From a brief read through the site I was misunderstanding your technique. Regardless, I’m looking forward to further thoughts about starting on film and then processing digitally.
I just came upon this post and am very excited that you will be doing a deep dive on this topic. I’ve been using a 4×5 occasionally for the last year or so. Haven’t really dedicated the time to get where I want to be (usually shoot MF film). Hopefully, your articles will be a catalyst for me. In the mean time I see there are lots of articles on your blog I need to catch with. Looking forward to the ride.