

Introduction
Masking and more specifically the skill of creating hard masks is often totally misunderstood and done the wrong way. I’m not referring to the technical process of creating a hard mask: almost everyone can do that. Take the pen tool, the lasso tool, use Adobe’s auto subject selection, or sky mask creation. This specific skillset is now within reach of many without too much effort or experience.
And yet, whenever I review the photo of an experienced photographer, proficient at making near perfect masks, I can’t help but wonder why they create the mask they shouldn’t create or not make the mask they should have created. No, it’s not a matter of (technical) preference or skill or type of photograph. It’s a more fundamental flaw. And I see it everywhere in photography, on every level, in every set of skills needed to create impactful or fine art photographs, whether this is masking or B&W processing or taking the photograph in the field: the majority, and again on every level, only understands parts of it but not how the various sets of skills relate to each other and are and should be integrated and interconnected. You can only truly understand a specific (sub)set of skills, if you understand how they are related to the other set of skills and how they contribute to the whole. Those skills aren’t isolated skills, they are part of a whole and should be understood as such.
For this article I’m only focusing on the set of masking skills, but I could easily extrapolate this to other photography skills. Masking though is especially one of those skills that seems to be completely isolated from all other photography skills.
Hard masks and soft masks
What are hard masks for? They are needed to isolate shapes and planes from their environment. It can be a plane like a sky, a side of a building or a body of water. It can be an object like a tree, or an entire building. It can be anything. They’re not created to isolate light or shadows, for that you have luminosity or soft masks. That’s the fundamental difference between hard masks and soft masks. For shapes and planes you create hard masks, for light, you create luminosity masks.
Why do you need to isolate those shapes and planes? There’s only 1 correct answer to this: to control the properties of a shape, plane or object within that selection. If you don’t need to control them with a high degree of precision, you don’t need a hard mask and should consider a different solution.
What types of control would you typically do within that selection? Controlling light, shadows, contrast, texture, even change the entire structure and replace it with something else.
How do you create hard masks? You create them by manually selecting them with the pen tool for example. Or with an automated tool like the Sky selection feature in Photoshop. Or based on its colors. Sometimes they have hard edges all around, sometimes edges are partly hard and partly softer. Sometimes all edges are very soft. Sometimes parts need to be more transparent and sometimes they are solid.
Why should some edges be hard or soft? Softer edges are good for intricate details that are almost impossible to mask but to isolate them anyway. They are also good when you need softer transitions instead of a hard separation. Also, softer edges are good when you need to control a shape or a plane with a much lower degree of accuracy.
Why do some parts need to be more transparent? Because the parts you’re selecting are actually transparent. E.g. windows, leaves, veils, etc.
[...] if you don’t need to control a specific plane or object with a high degree of accuracy, and change its properties, then you don’t need to isolate those planes or objects[...]
Out of the above follows that if you don’t need to control a specific plane or object with a high degree of accuracy, and change its properties, then you don’t need to isolate those planes or objects. Hence, if you don’t need to isolate them, you don’t put any effort in it by trying to select them with a tool like the pen tool. And you don’t need to decide if edges should be harder or softer – they should be softer as a rule if you need a selection nevertheless. Or if parts need to be more or less transparent.
And yet, those masks are created anyway. Without consideration. Without considering if they need to control their properties. They just create them. Why? Because they consider only the task, not the why of the task. Not the goal of the task.
Or they create the masks knowing that they want to control it but they don’t know what type of control they need. Hence, they don’t know if they need a softer or harder mask. And they don’t know what needs to be included or excluded from the mask.
If you consider creating masks a meditative activity then I would encourage to just keep doing that. But if you’re like me who only wants to be creative with the actual photo and consider masking a necessary but time-consuming activity while you’re pressed for time and that only distracts from the actual creative endeavour, then you should consider approaching masking in a holistic and more intentional and efficient way that serves a very targeted purpose within the artistic process.
You envision not only the end result of the photo but you also envision in detailed steps how to get to the end result. Not roughly, but quite exactly. You should know for around 80% what you need to do to get there. In very detailed steps.
Vision is not only being able to visualize the end result, but also to visualize and anticipate the steps you need to do to come to the end result. What use does vision have if you don’t know how to realize that vision? Then vision is just a hopeful and naive expectation with a specific name: daydreaming. They hope for the best and only plan not because they know why exactly, but because that’s what they’re taught to do.
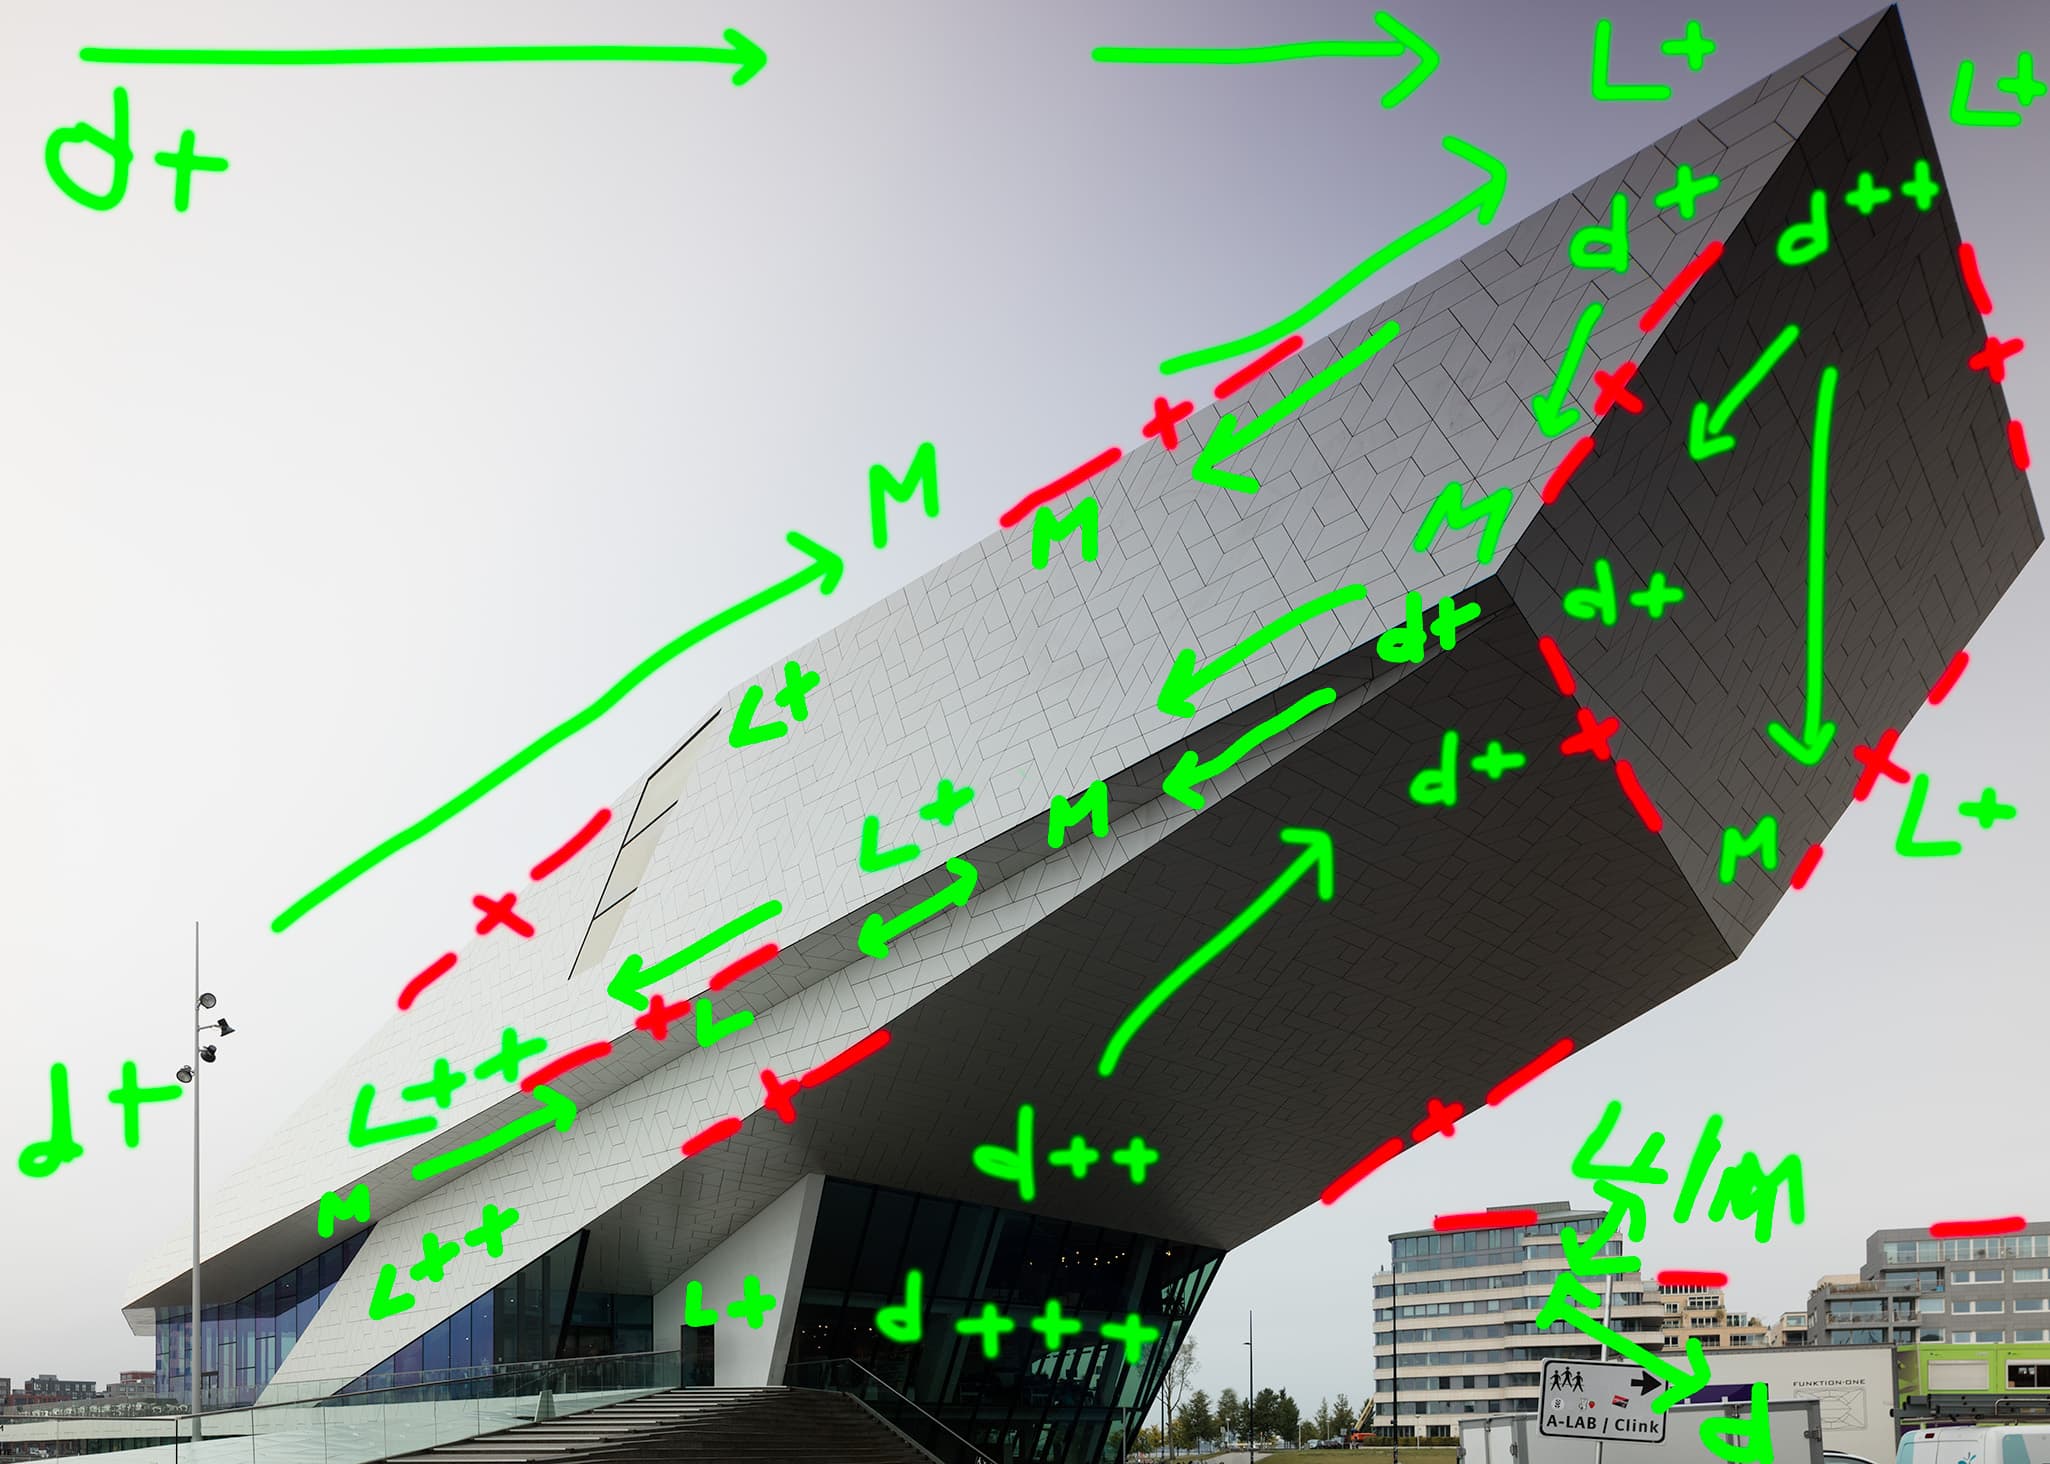
Back in the analog days darkroom printers would make mark-ups for dodging and burning and other adjustments before actually making the print. Just check out this recently released Darkroom Collection by Magnum that consists of a series of famous Magnum photographs with mark-ups and notes for printing in the analog darkroom.
You can do similarly in the digital darkroom. See the mark-ups below of a photo I processed. I don’t really make those mark-ups on the photo as I do them all in my head in perhaps even greater detail. The red highlights for example indicate the contrasts and basically if that needs a soft or hard edge. The ‘+’ indicates a hard accurate edge in the mask, while the ‘-‘ indicates a soft edge in the sky mask or even no edge at all and to include the building in the sky mask. The green highlights are the dark and light areas and the transitions. If you don’t do this either in your head or on your photo, you might pull it off, but more likely, you will fail.
Steps for an integrated and holistic approach
What you need to do to make vision and ultimately masking more purposeful are the following steps, in the field and then in the digital darkroom
In the field
- You’re about to shoot a building (replace with tree, product, person, anything) and have a vision of it – an idea what you want to do with it in terms of a visual style.
- In the field, you consider the angle, the distance, the perspective, the spatial composition. Getting it right in camera for 95% is my aim.
- While in the field, you already start masking by looking at the intensities of light and contrasts as it will help you mask easier and more accurately in photo editing software. The better and more uniform the contrast in and around your figure, the better the mask. It doesn’t matter if you use Photoshop’s AI: also AI masks are better when you have good contrast
- In the field, you look for angles, that will eliminate or include objects that might distract or might serve your composition – it will save you time behind the computer: the fewer objects that aren’t essential, the less you have to consider those objects when masking
- You assess the result on the back of the camera. If any of the above mentioned isn’t good enough, you shoot again – it will save you time behind the computer and you have to correct less, or nothing at all.
[...] Simplicity in complex situations, is a sign of mastery [...]
In the digital darkroom – behind your computer
Now you’re behind your computer and you’ve selected the image that comes closest to the idea you had, you start analyzing the image first before doing anything. Spend 1 hour analyzing and you save yourself many hours correcting and editing. An important part of this analysis is the assessment of luminosity masks. They’ll inform you what hard masks to create and how and what you don’t need to mask. They will also inform you how to do the adjustments you need, like creating depth, increased details and contrasts, etc.
One important rule: keep it simple. The fewer masks you need, the better. The more you can include in one mask, the better. It becomes a matter of what to include in the Figure mask and what should be transferred to the Ground mask. The mask with the highest accuracy is always the mask separating the Figure from the Ground, everything else requires less or no accuracy. I always aim to have maximum control with a minimum number of masks. If I can do a complicated architectural image consisting of a building with multiple planes with only 3 masks (1 Sky mask, 1 Figure mask and 1 Ground mask), and can do all adjustments with maximum control using a combination of the hard masks, the luminosity masks you create automatically on the fly and targeted, well-chosen adjustments and restore steps, then it will result in my best photos. Simplicity in complex situations, is a sign of mastery.
- You consider figure, ground, and potential sub-figures. The figure almost always needs to be masked, and the same applies to skies. Details in the ground can usually be skipped as it will be treated the same way as the rest of the ground. Include as much as possible in the ground.
- You create the lights and dark luminosity masks and analyze those masks to assess where you don’t need the hard masks
- You also decide on the tonal composition, the tonal distribution and balance: parts will be dark, other parts light or in the middle. You decide the area with the highest contrast and where parts can recede and disappear in the ground. The figure will need presence and depth, so you need to identify the planes and edges in the figure. All those parts will have to be masked separately and some parts don’t need to be masked
- Based on the previous you can now decide which part doesn’t need much or no control, so no masks are needed or only masks with approximate shapes and soft edges, or you can do some quick local adjustments with a quick provisional mask if necessary. The figure and all its planes always need the most accurate masks.
- Details in the figure, like windows and window panes but also signage can often be skipped and can be controlled by using luminosity masks with temporary selections and restore steps.
- Antennas on top of the Figure can often be skipped too as they can be included in the masks of the sky. It will hardly be visible anyway so why need more control than needed?
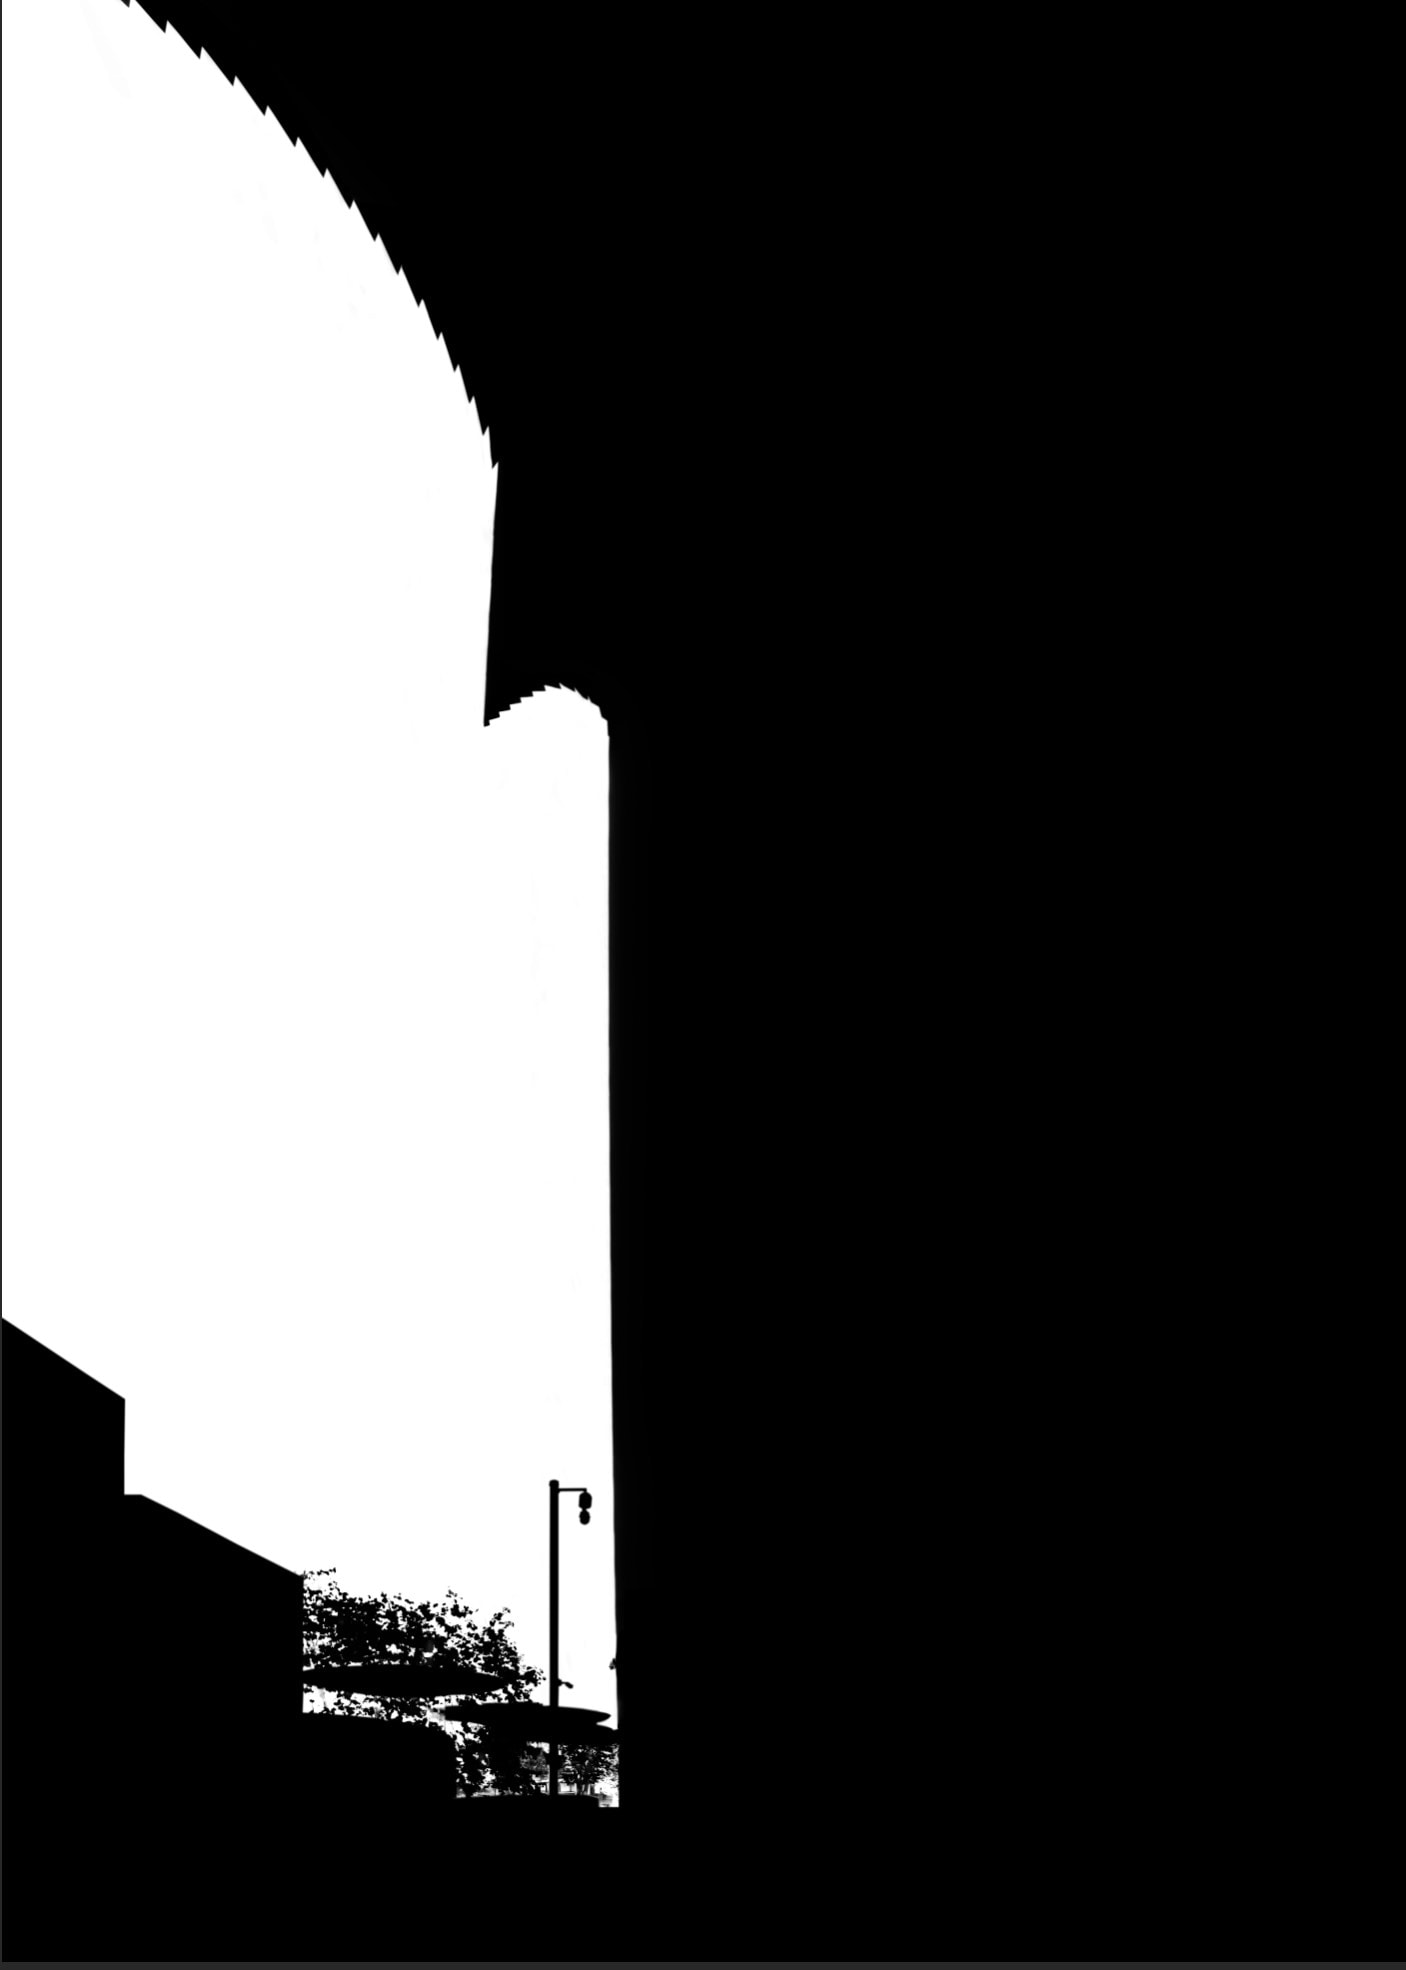
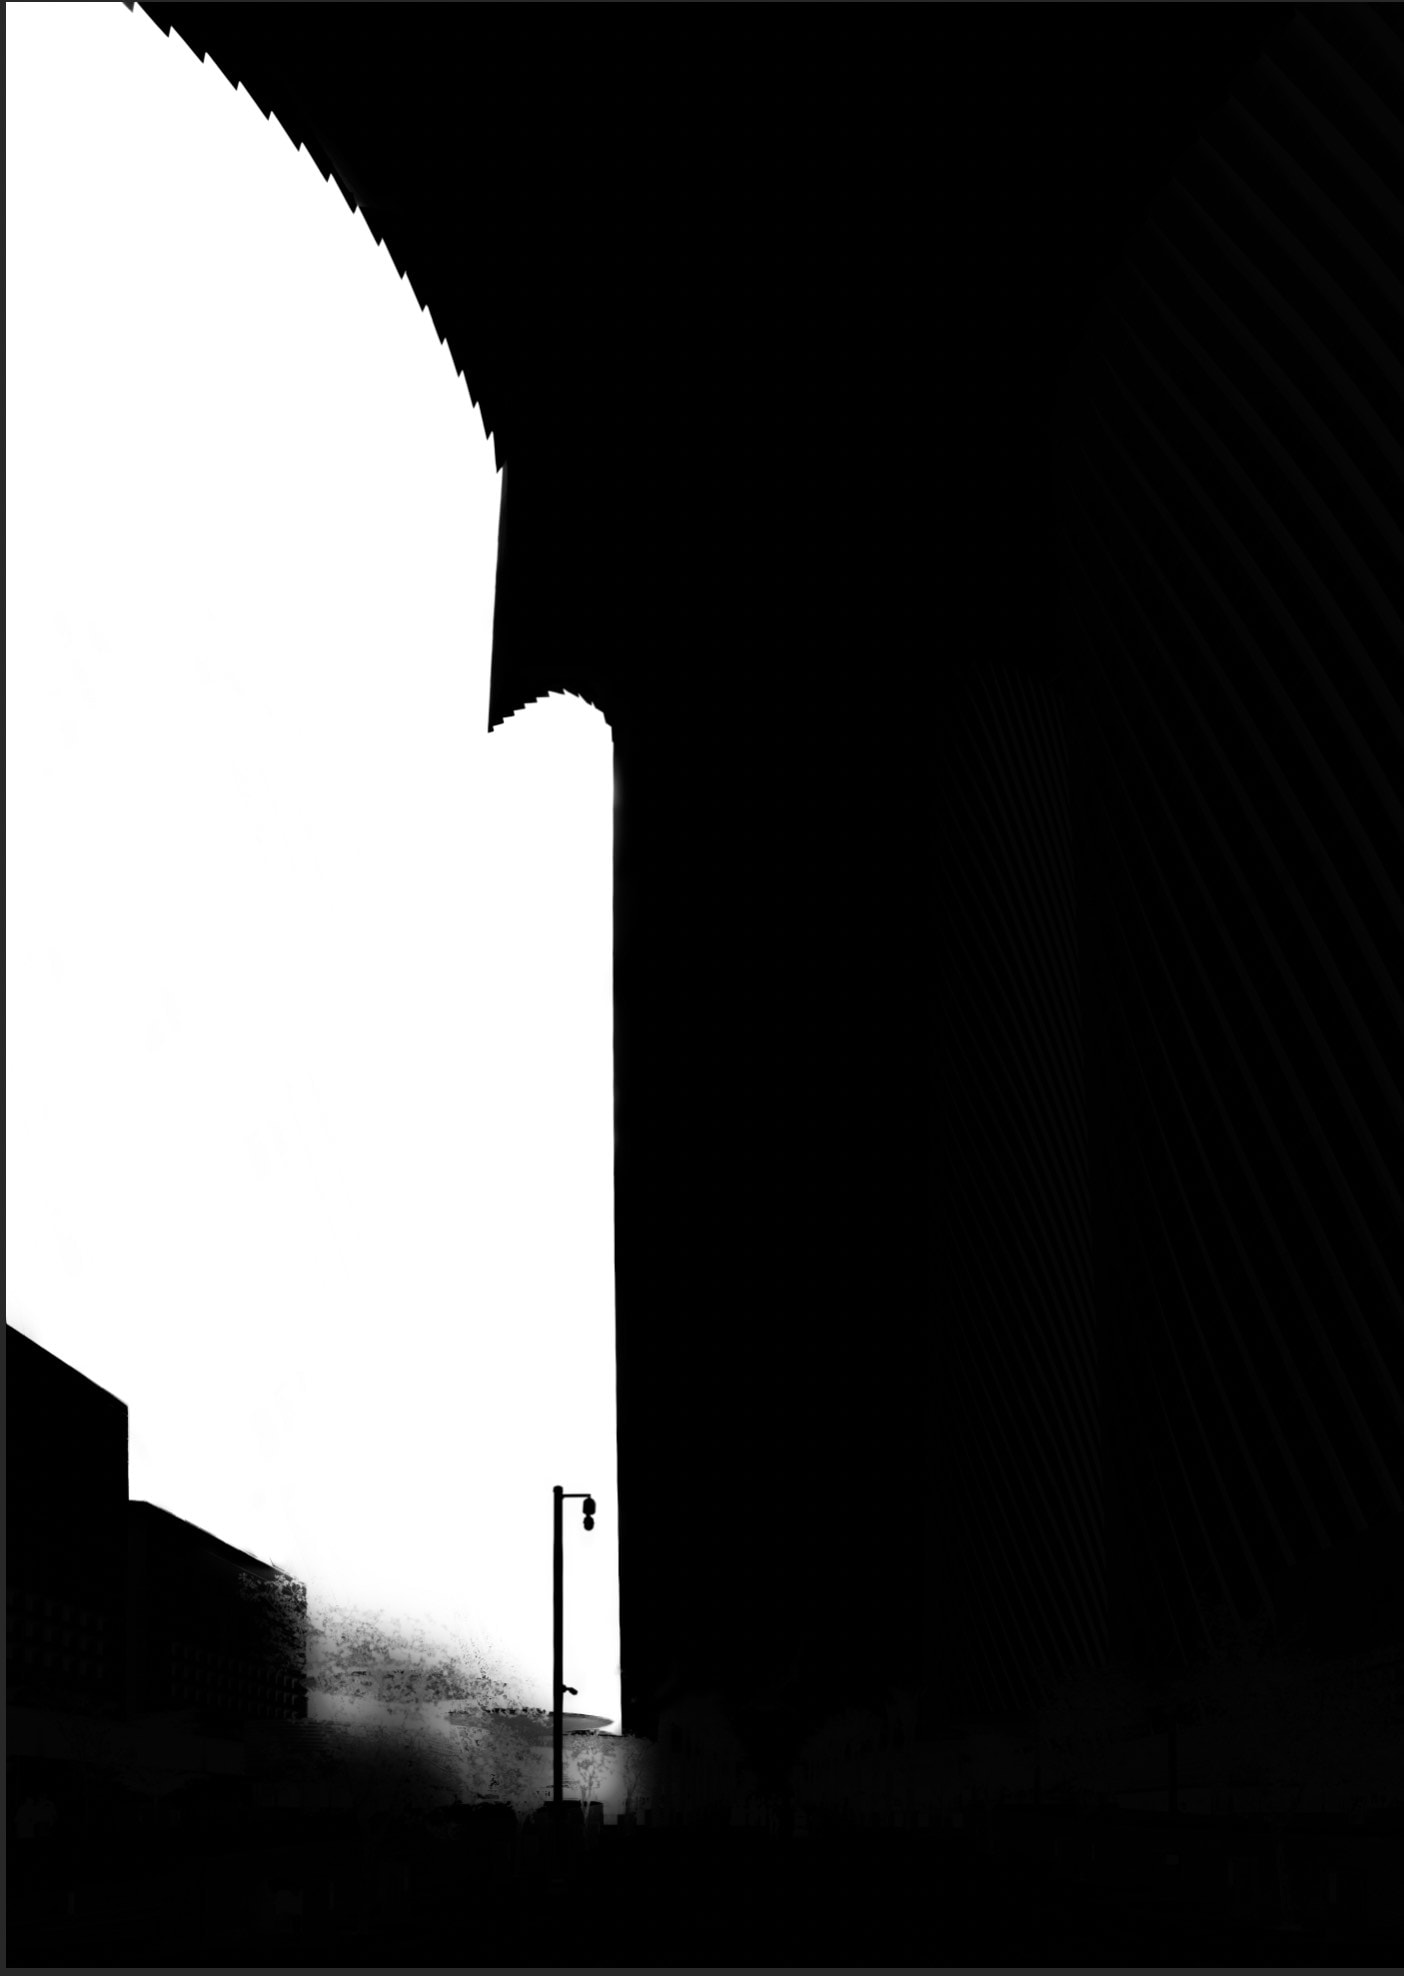
- Trees in front of buildings can best be controlled by masks with a soft edge as they’re part of the ground. Softer edges also prevents strange artifacts that don’t need to be corrected. The example below with a mix of hard and soft edges are automatically generated by the Quick Mask Pro UXP panel. They can also be created manually which takes a bit more time.
- No need to select all the smaller objects in ground but often also figure because you often don’t need control there so go with softer edges there too or use restore steps.
- You haven’t done a thing yet except visualizing every step of the way. And yet, you’re almost done.
- You start masking with all the above in mind.
- Then you do all the adjustments you had envisioned using the created masks and leave nothing unused. If you don’t need a mask, you’re analysis is off. Along the way you create luminosity masks and use them wherever needed within the hard masks you’ve created.
- At some point you’ve finished without wasting time. Exactly according to the visual style you’ve envisioned at the start.
In conclusion
Vision is more than just envisioning the visual style. It is also about identifying, determining and detailing all the steps you need to get to the final visual result.
Spontaneity and letting yourself be surprised is important in the creative process, but once you’ve captured the photograph in the field and you’ve determined a vision, a visual style, there’s no place anymore for spontaneity and good luck. It is just accurate planning and detailing all the steps.
If you want to see this process in practice, I just announced a Practical Advanced Masking class for October 1, 2023 that is almost sold out by the time this article is public.


2 Responses
Dear Joel,
This is another excellent written paper of high value for me as an artist. Thank you very much for sharing your artistic ideas, skills and knowledge.
Best regards,
Henk
Thank you Henk, always appreciate your encouraging words.
Joel